Odoo is a powerful, open-source ERP system known for its versatility, user-friendly, and adaptability across industries. Its modular approach allows companies to choose the features they need and customize the system to meet their unique requirements. This has made it a popular choice for small, medium businesses, and larger organizations. With the recent release of Odoo 18, users have access to enhanced features, improved security, and optimized workflows, boosting business productivity. If you're looking to install Odoo 18 on Windows, this guide will take you through each step to get it running smoothly.
This Odoo Installation guide is a helpful tool, especially if you're not from a technical background. Using this guide you can complete the installation process without errors.
Step 1: Install Python
To begin the installation of Odoo 18, you first need to install Python.
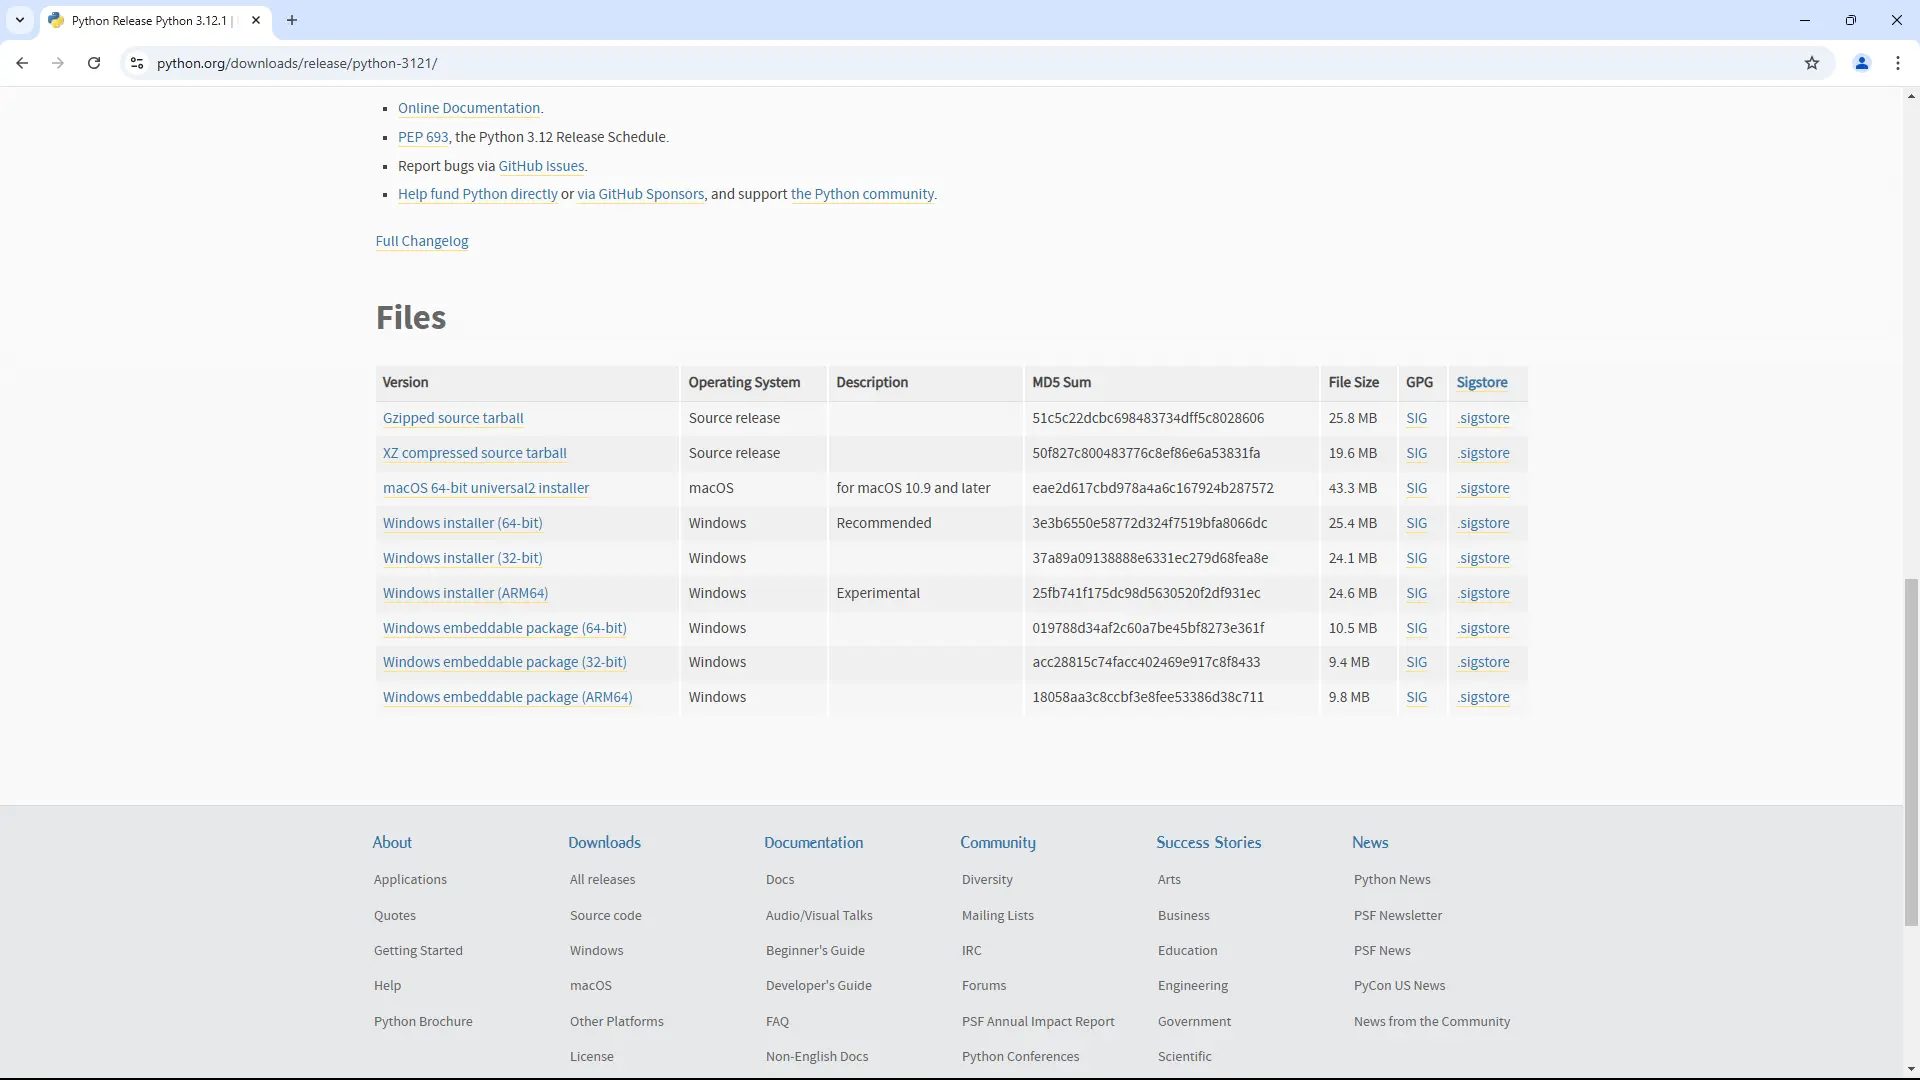
1. Go to the official Python website at https://www.python.org/downloads/ to download the latest version. For Odoo 18, make sure to select Python version 3.10 or above.
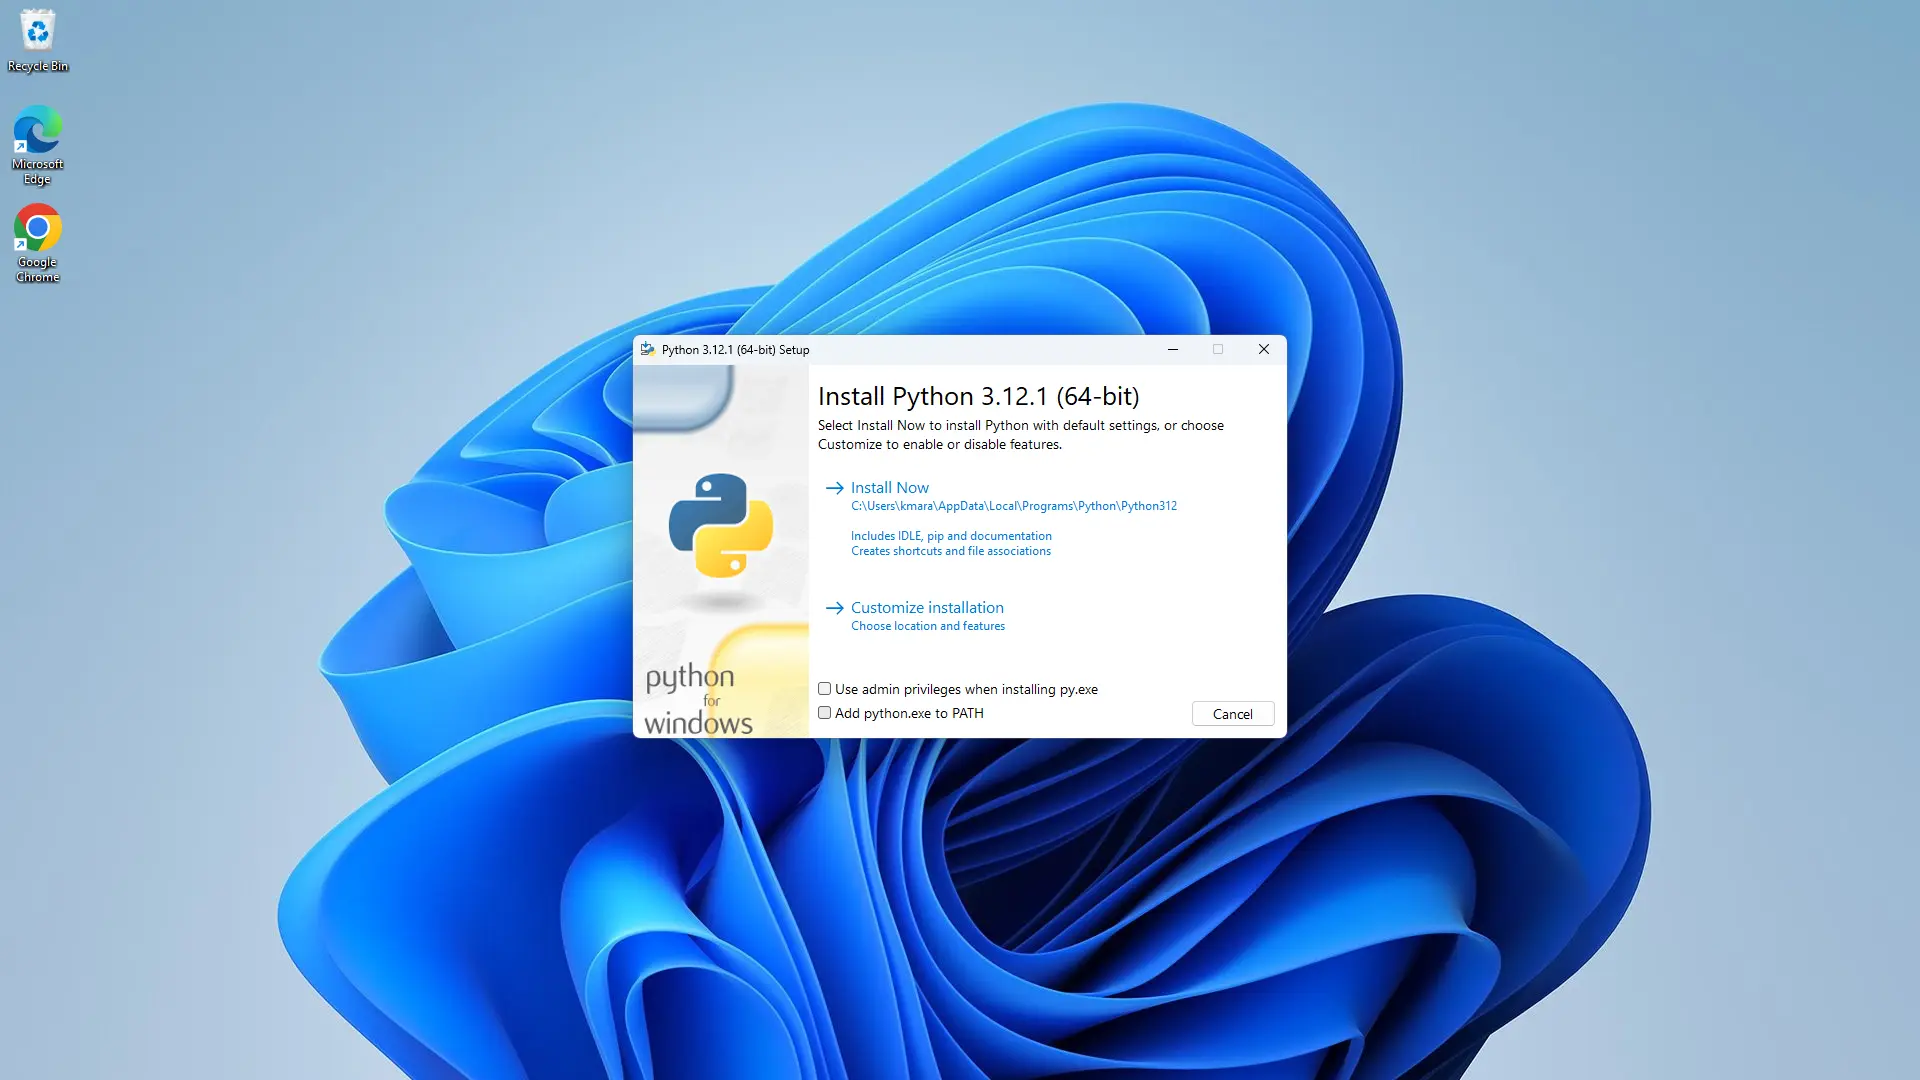
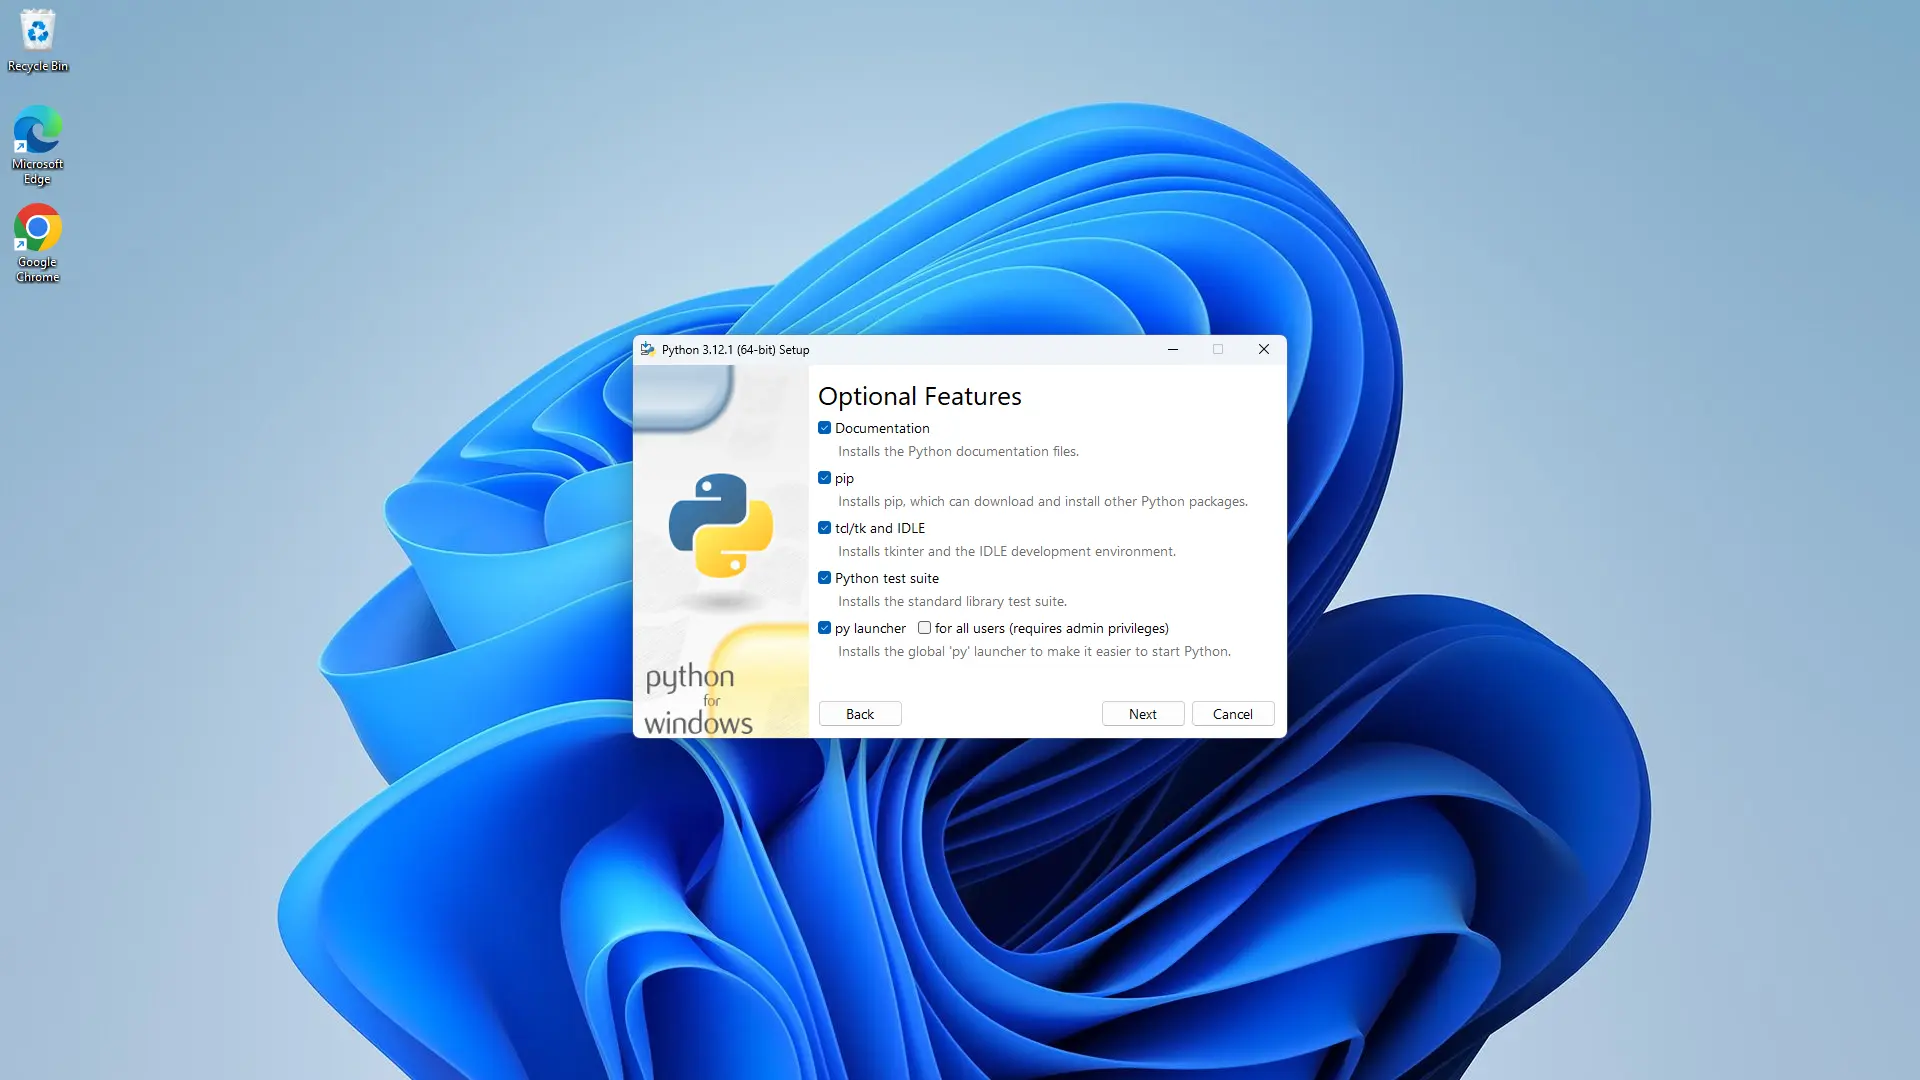
2. After downloading, open the installer file. When prompted, select the ‘Custom Installation’ option. This allows you to customize the installation settings according to your preferences.
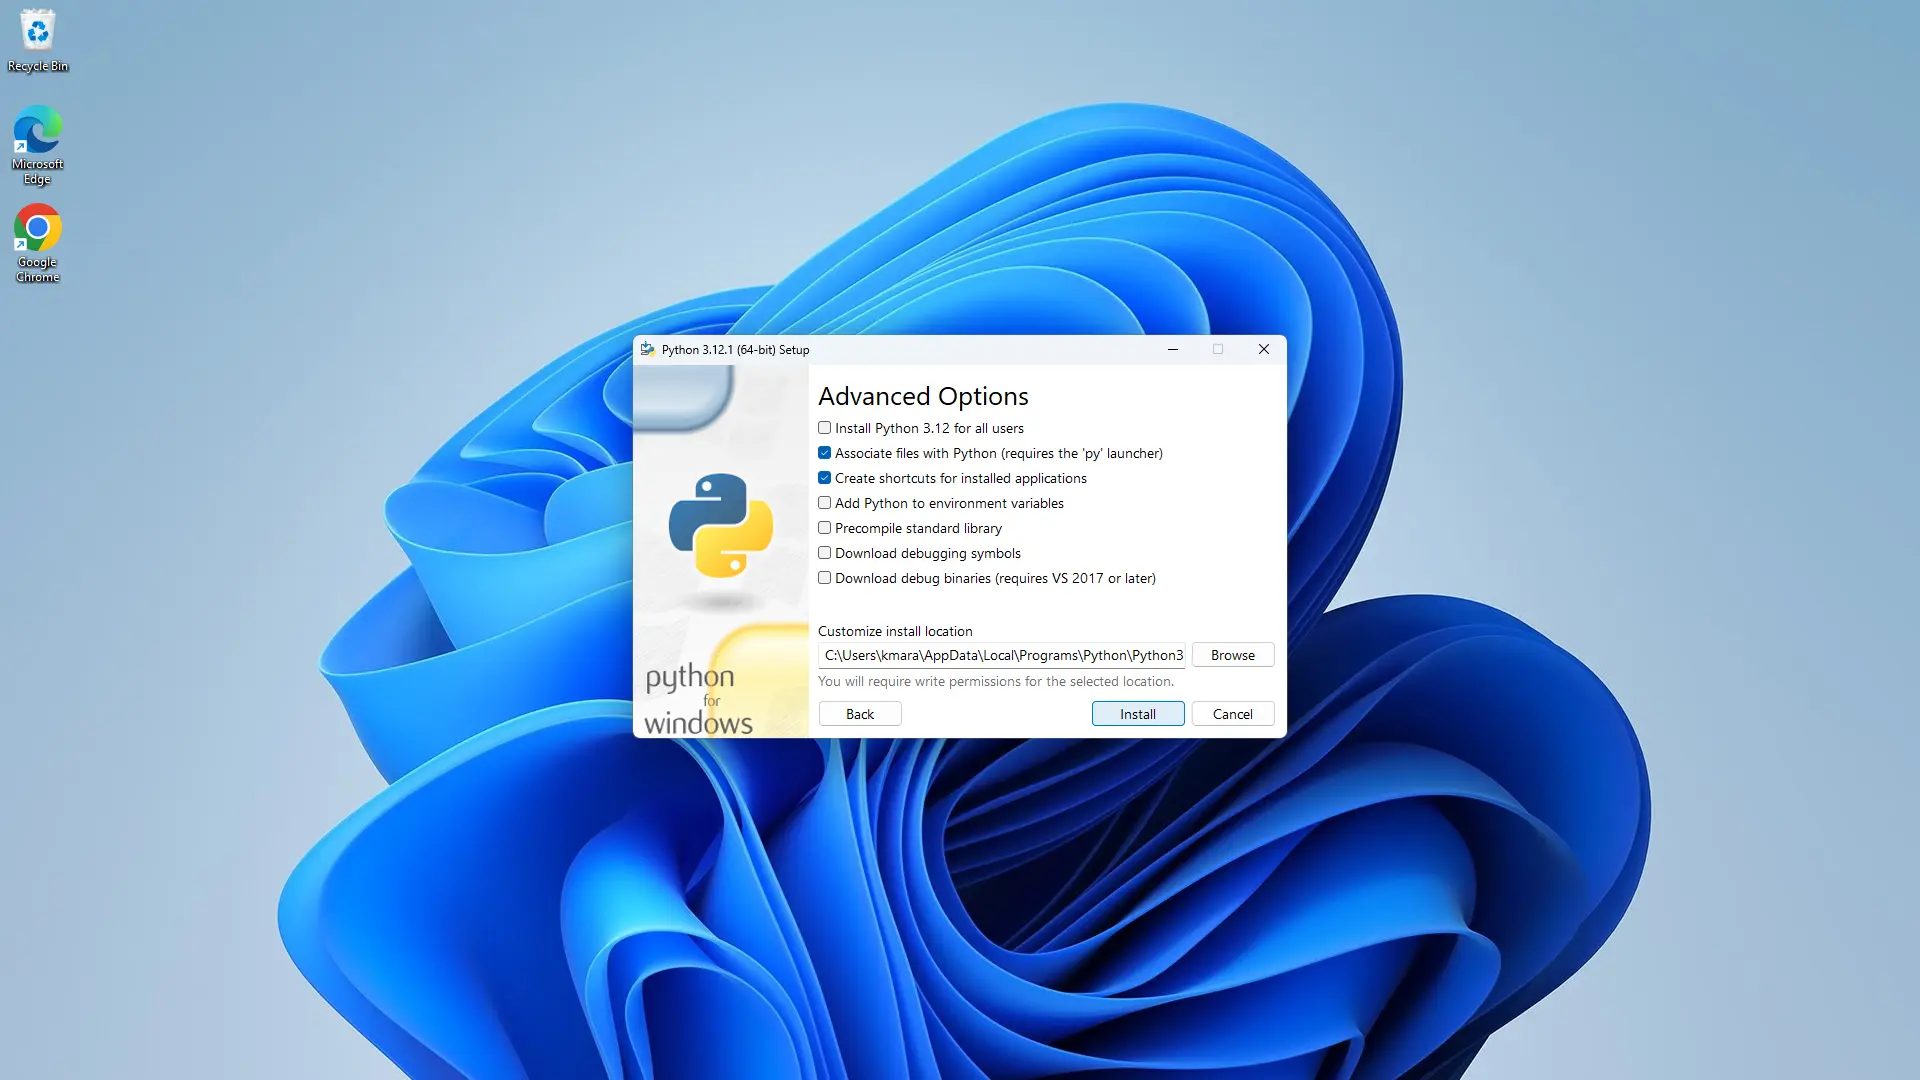
3. During installation, check the box labelled “Add Python 3.xx to PATH.”
Step 2: PostgreSQL Installation
Next, you must install PostgreSQL, which serves as Odoo's database management system.
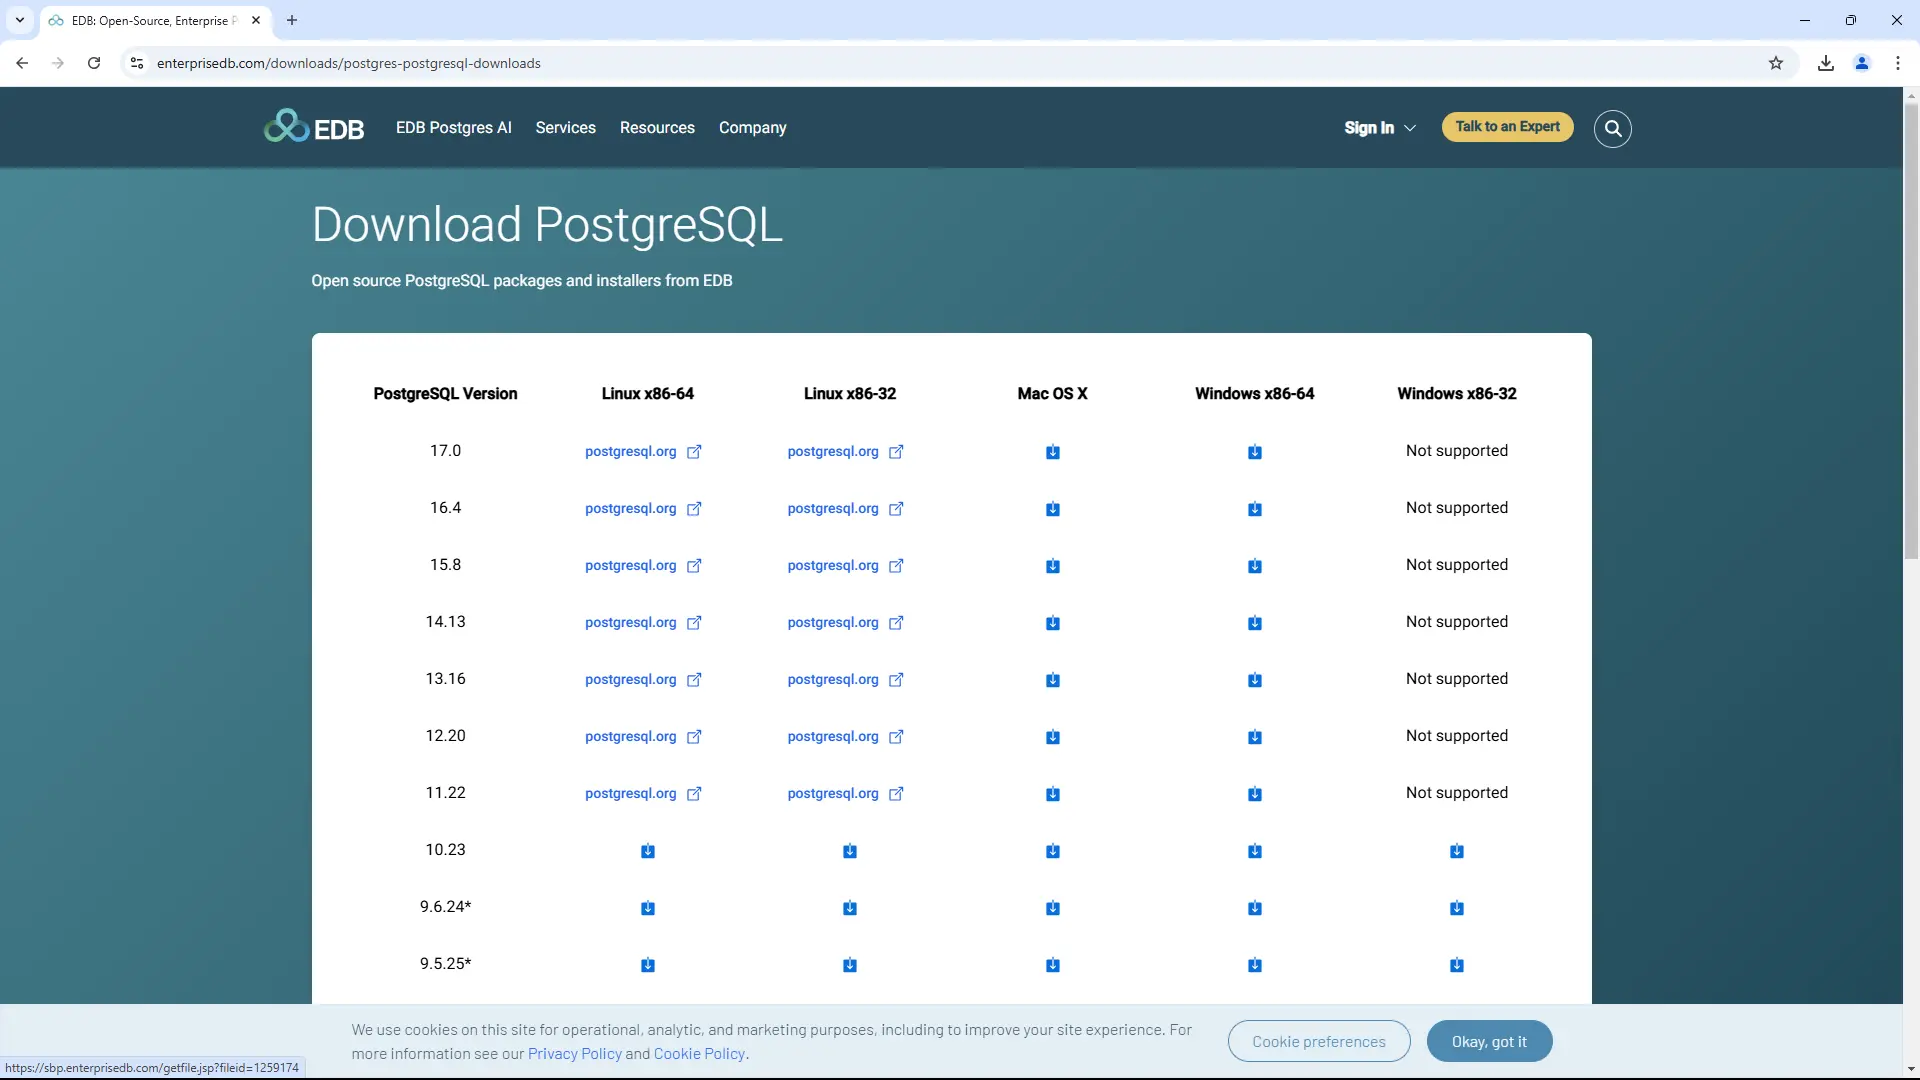
1. Go to the PostgreSQL download page at https://www.enterprisedb.com/downloads/postgres-postgresql-downloads and download the installer for Windows( “Windows x86-64”). Make sure you are downloading version 13 or later for optimal compatibility with Odoo.
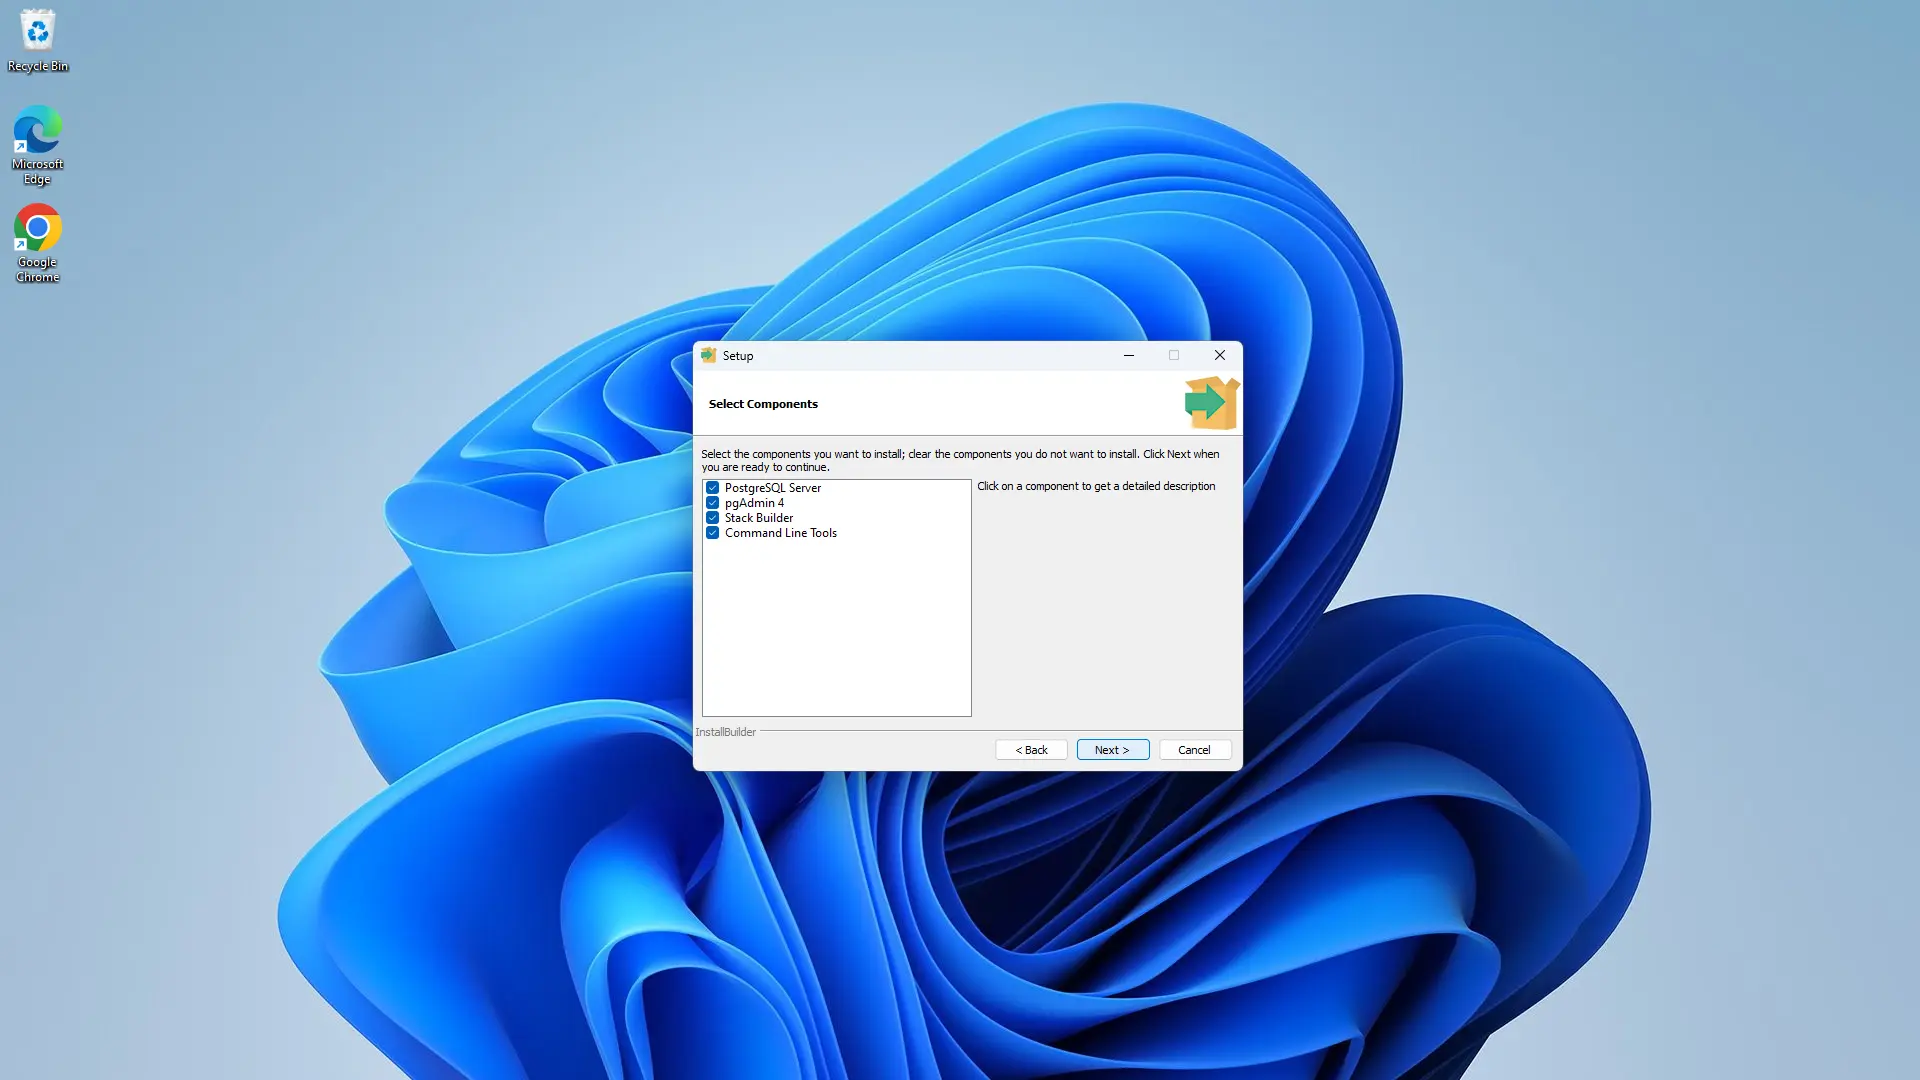
2. Launch the installer and on the “Select Components” page, ensure that all component checkboxes are checked.
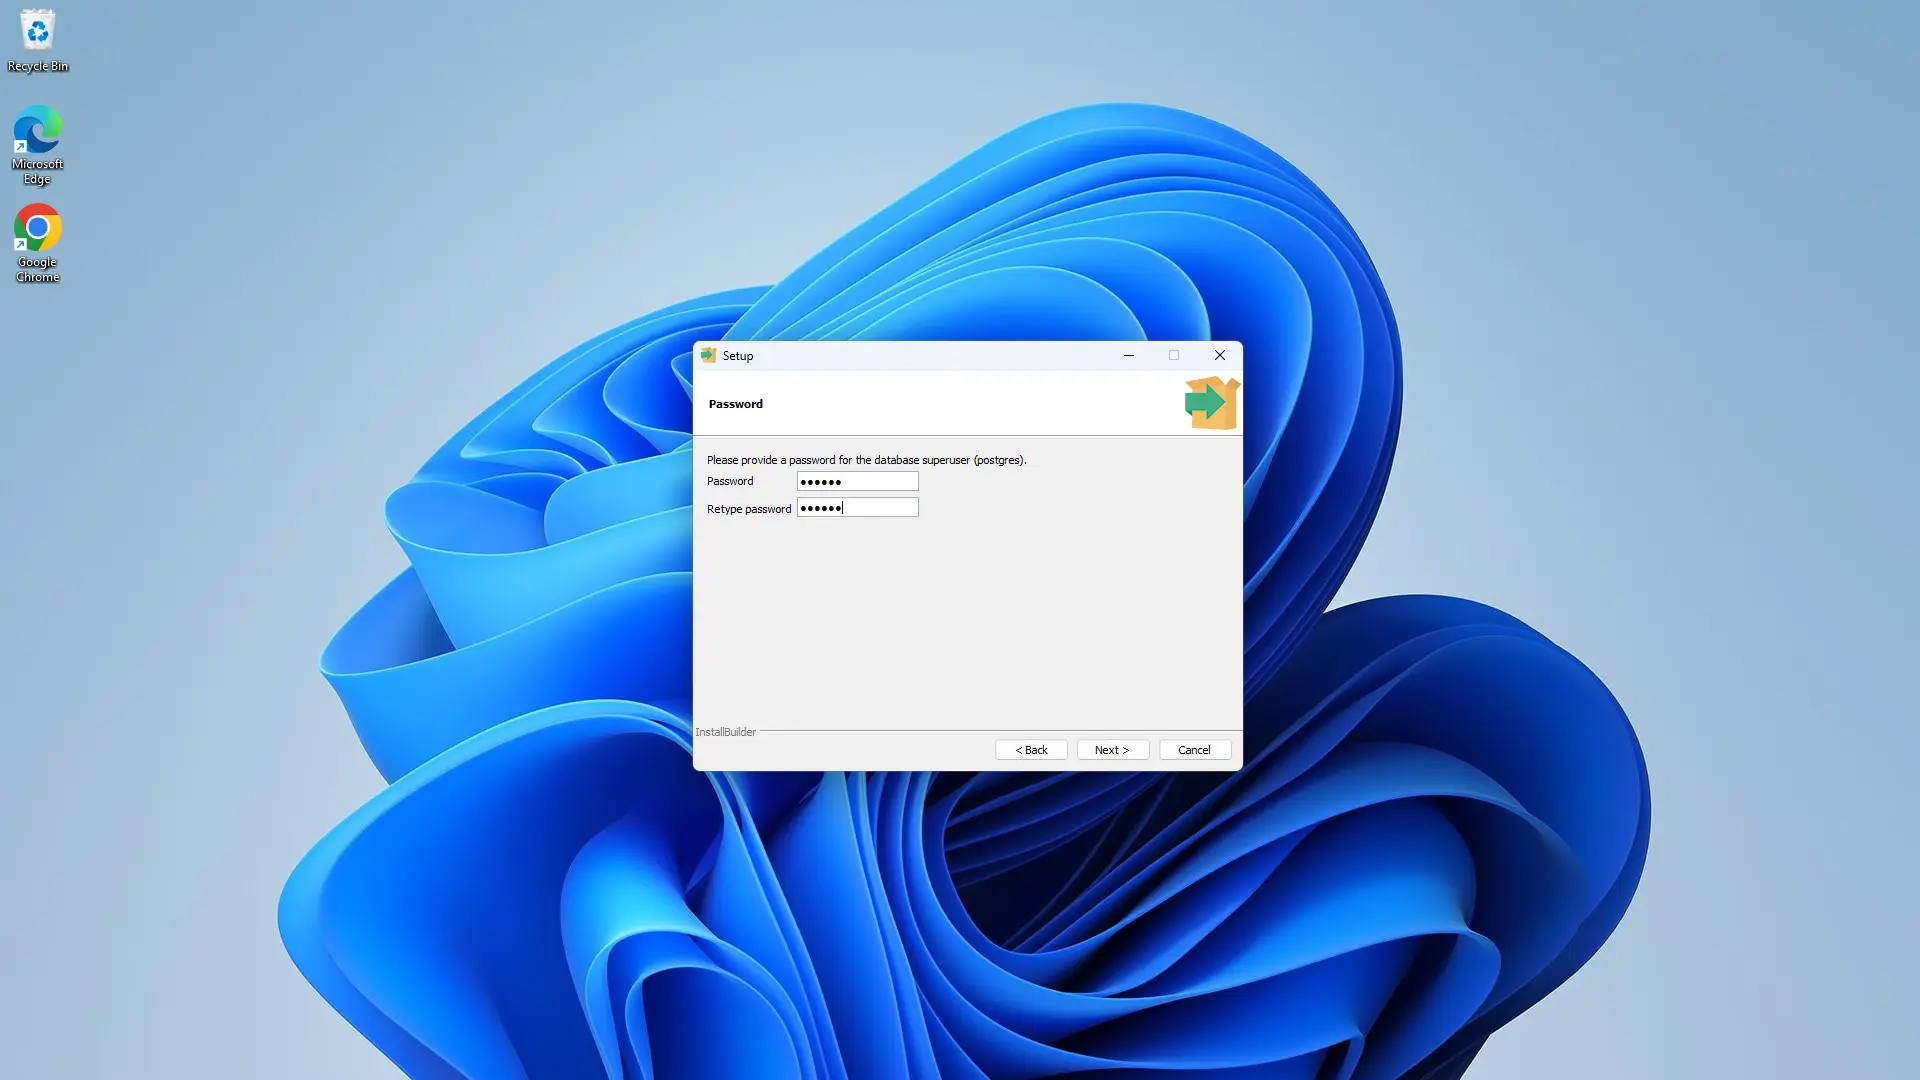
3. On the “Password” page, provide a superuser password that you will remember.
4. Keep all other settings as default and complete the installation.
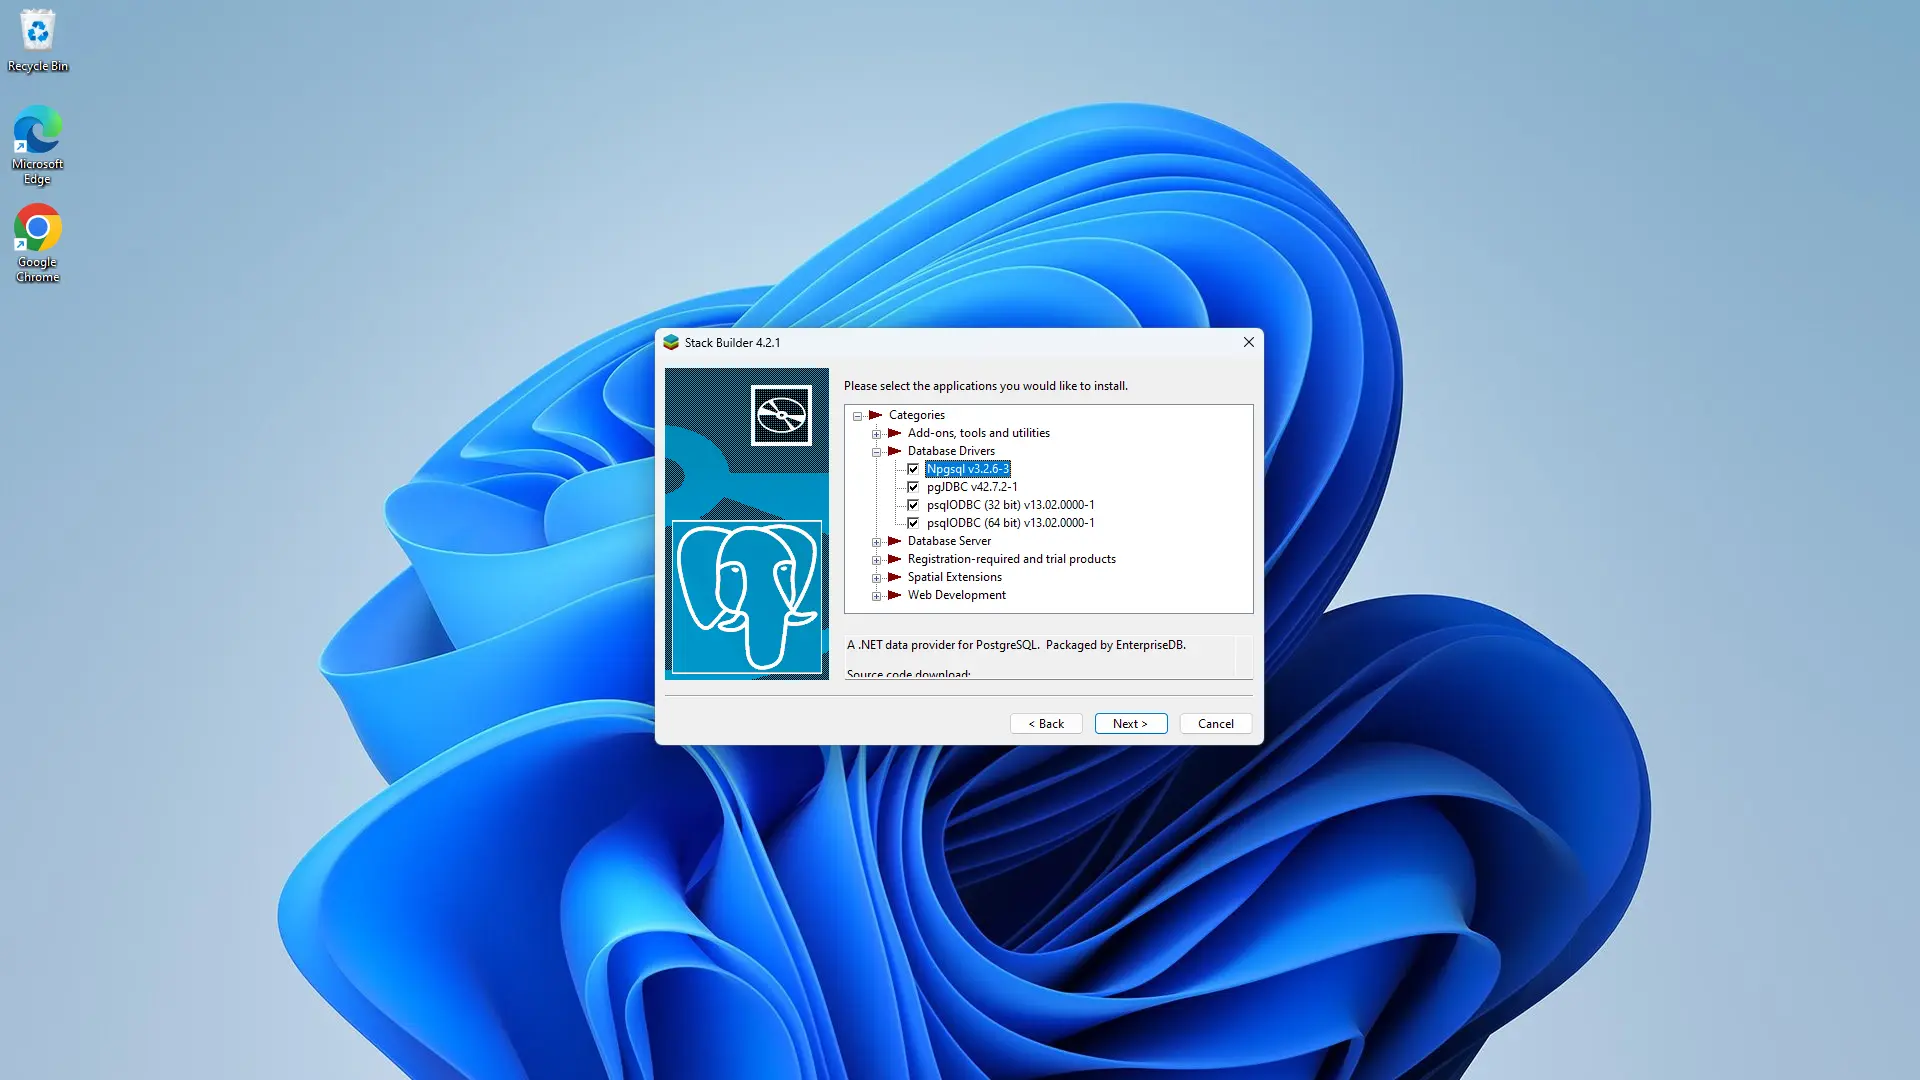
5. After installing PostgreSQL, a Stack Builder wizard will appear to install additional components. In this wizard, select all applications within the “Database Drivers” category and complete the setup.
Step 3: pgAdmin4 and PSQL Configuration.
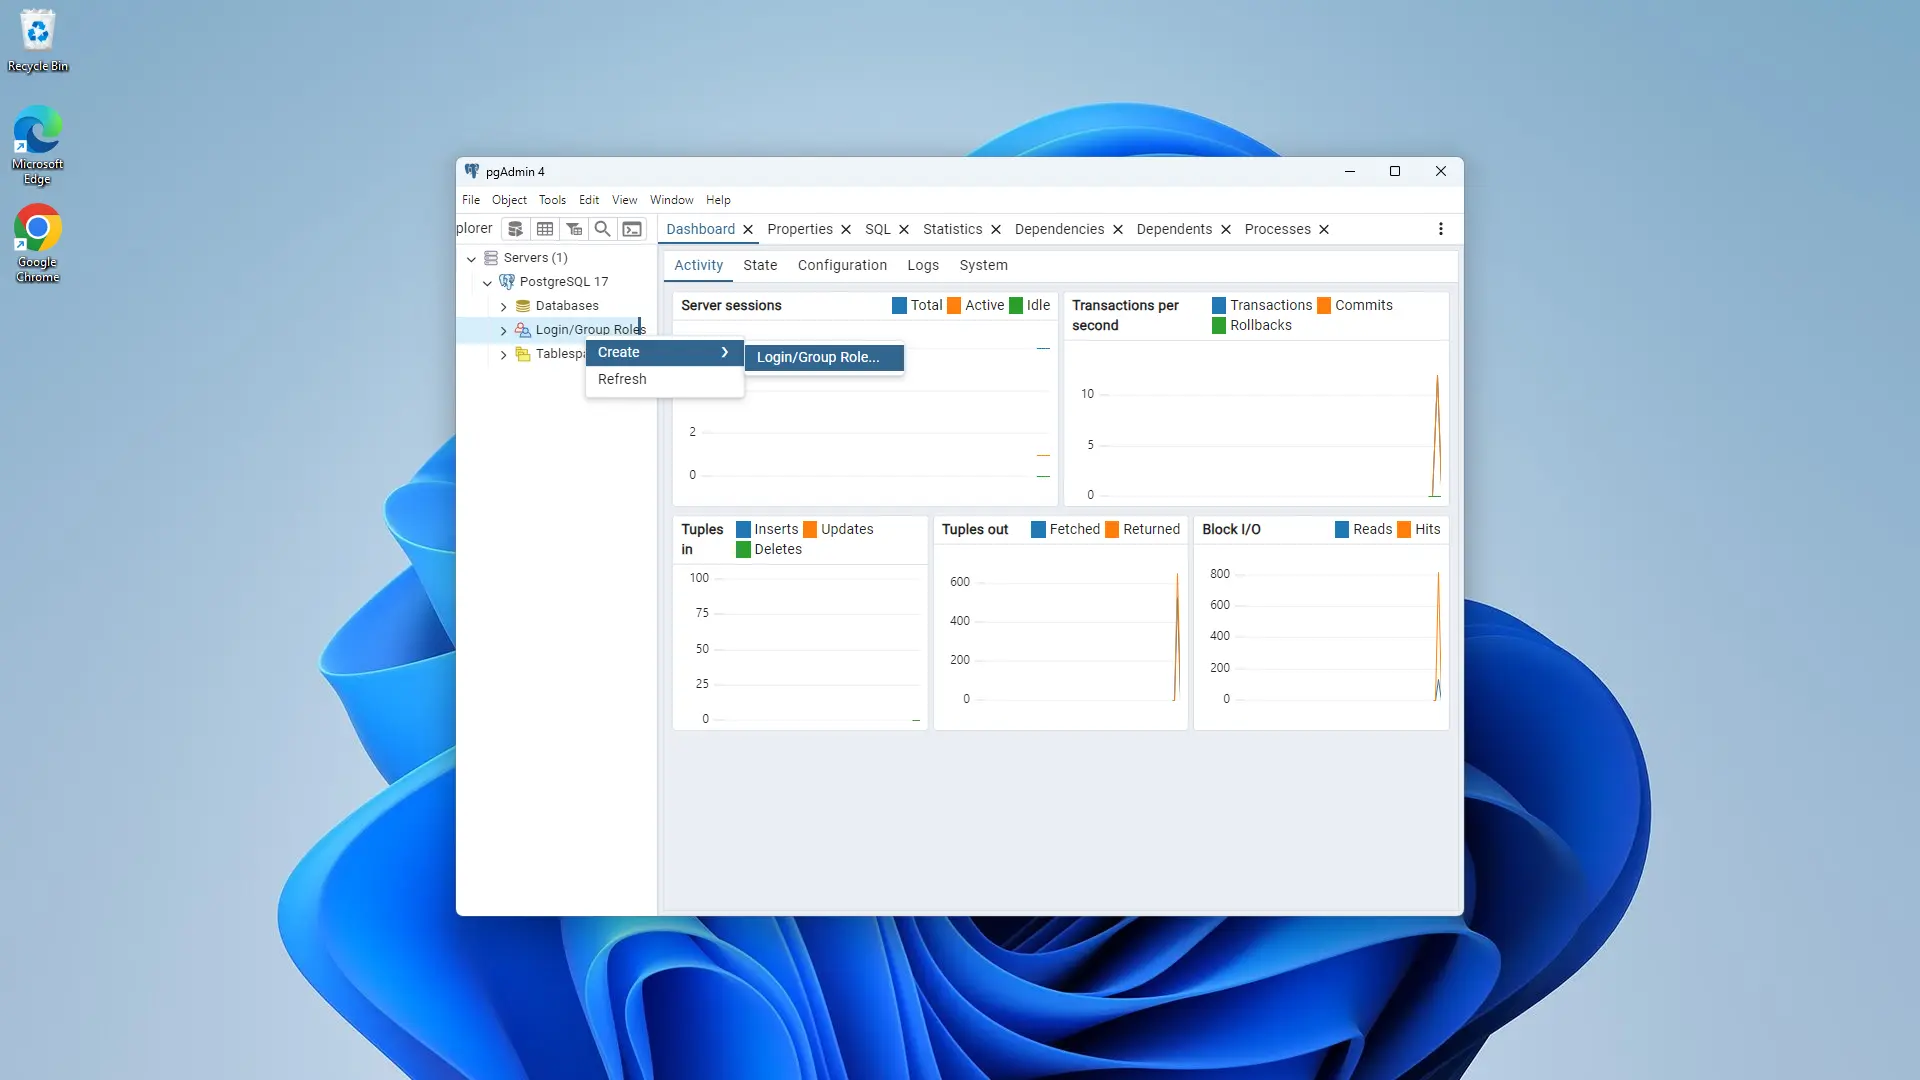
1. During the PostgreSQL installation, you likely selected pgAdmin4 as one of the components, so it is already installed on your machine. Open pgAdmin4 and expand "Servers" in the Object Explorer on the left side and enter your password for secure access. Under "Servers," expand the Postgres object and find “Login/Group Roles” Right-click on it to create a new role.
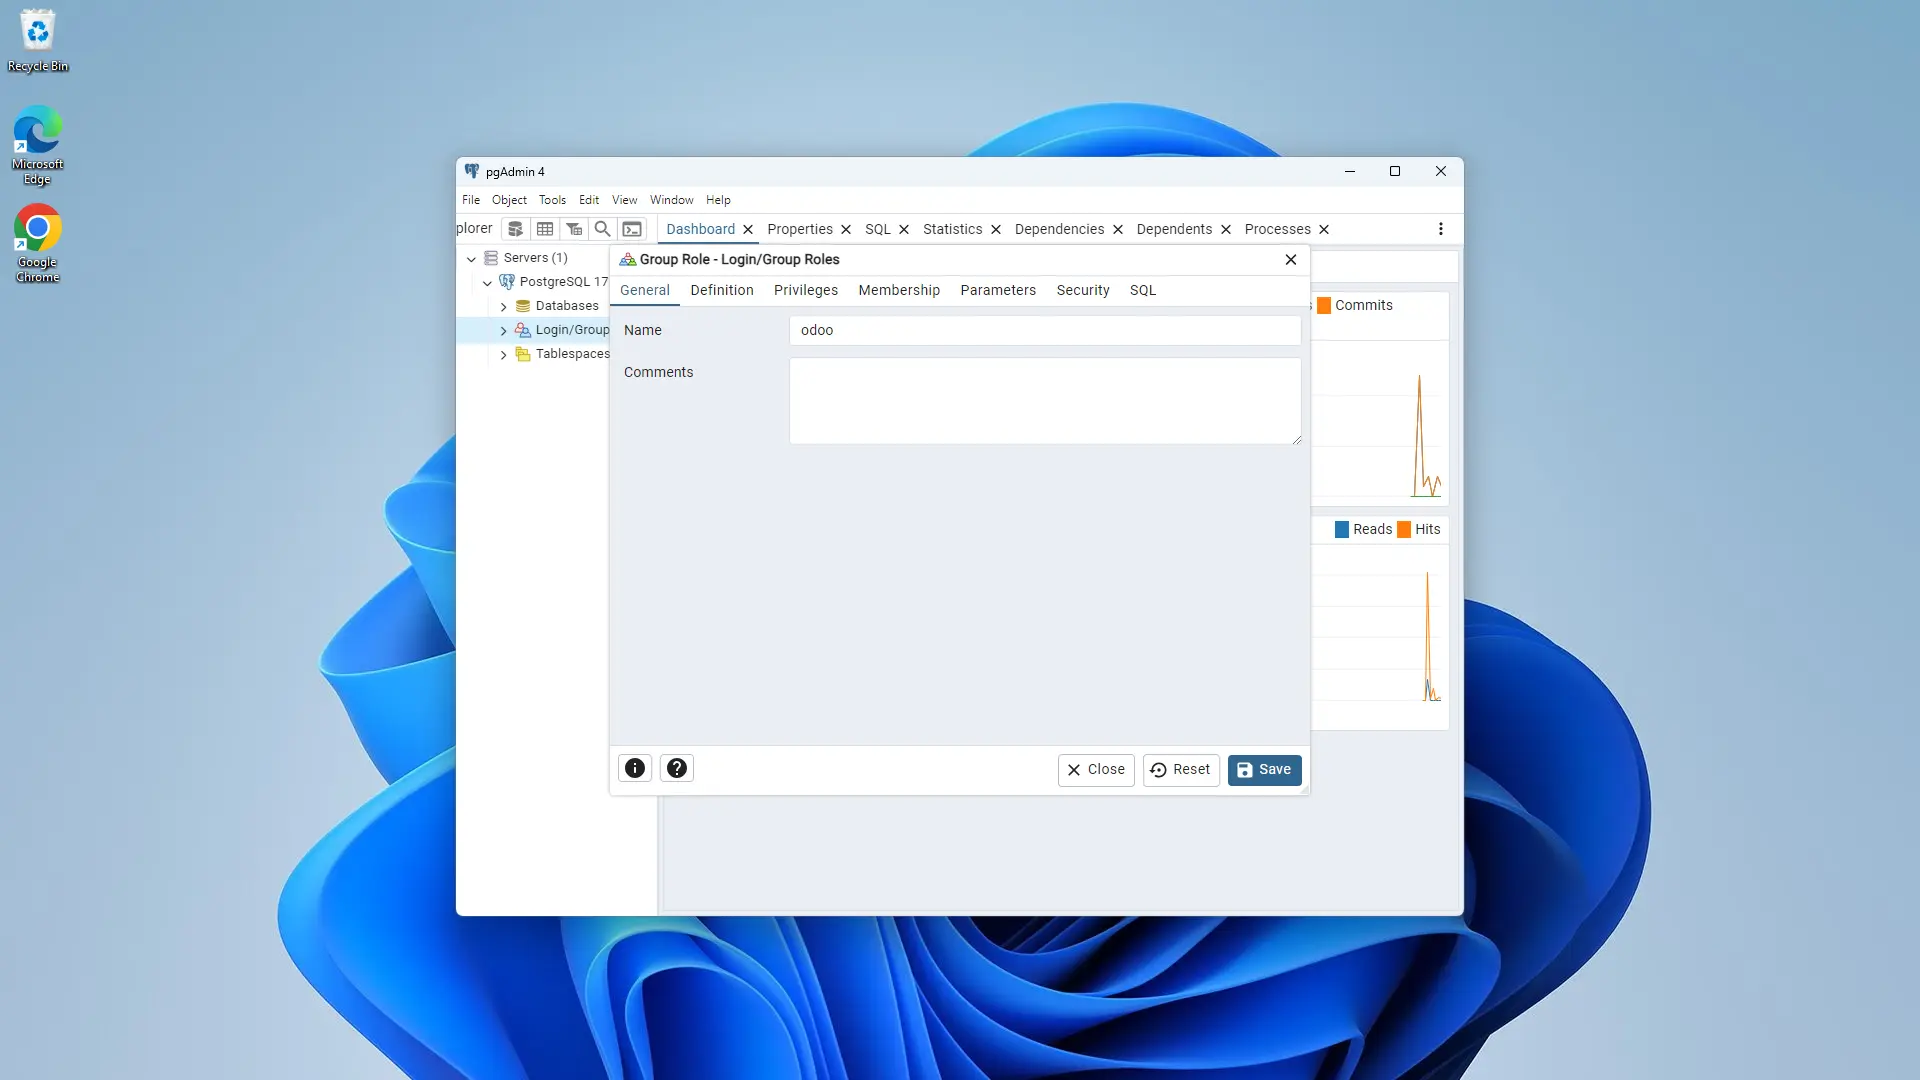
2. Provide a name for the role in the General tab.
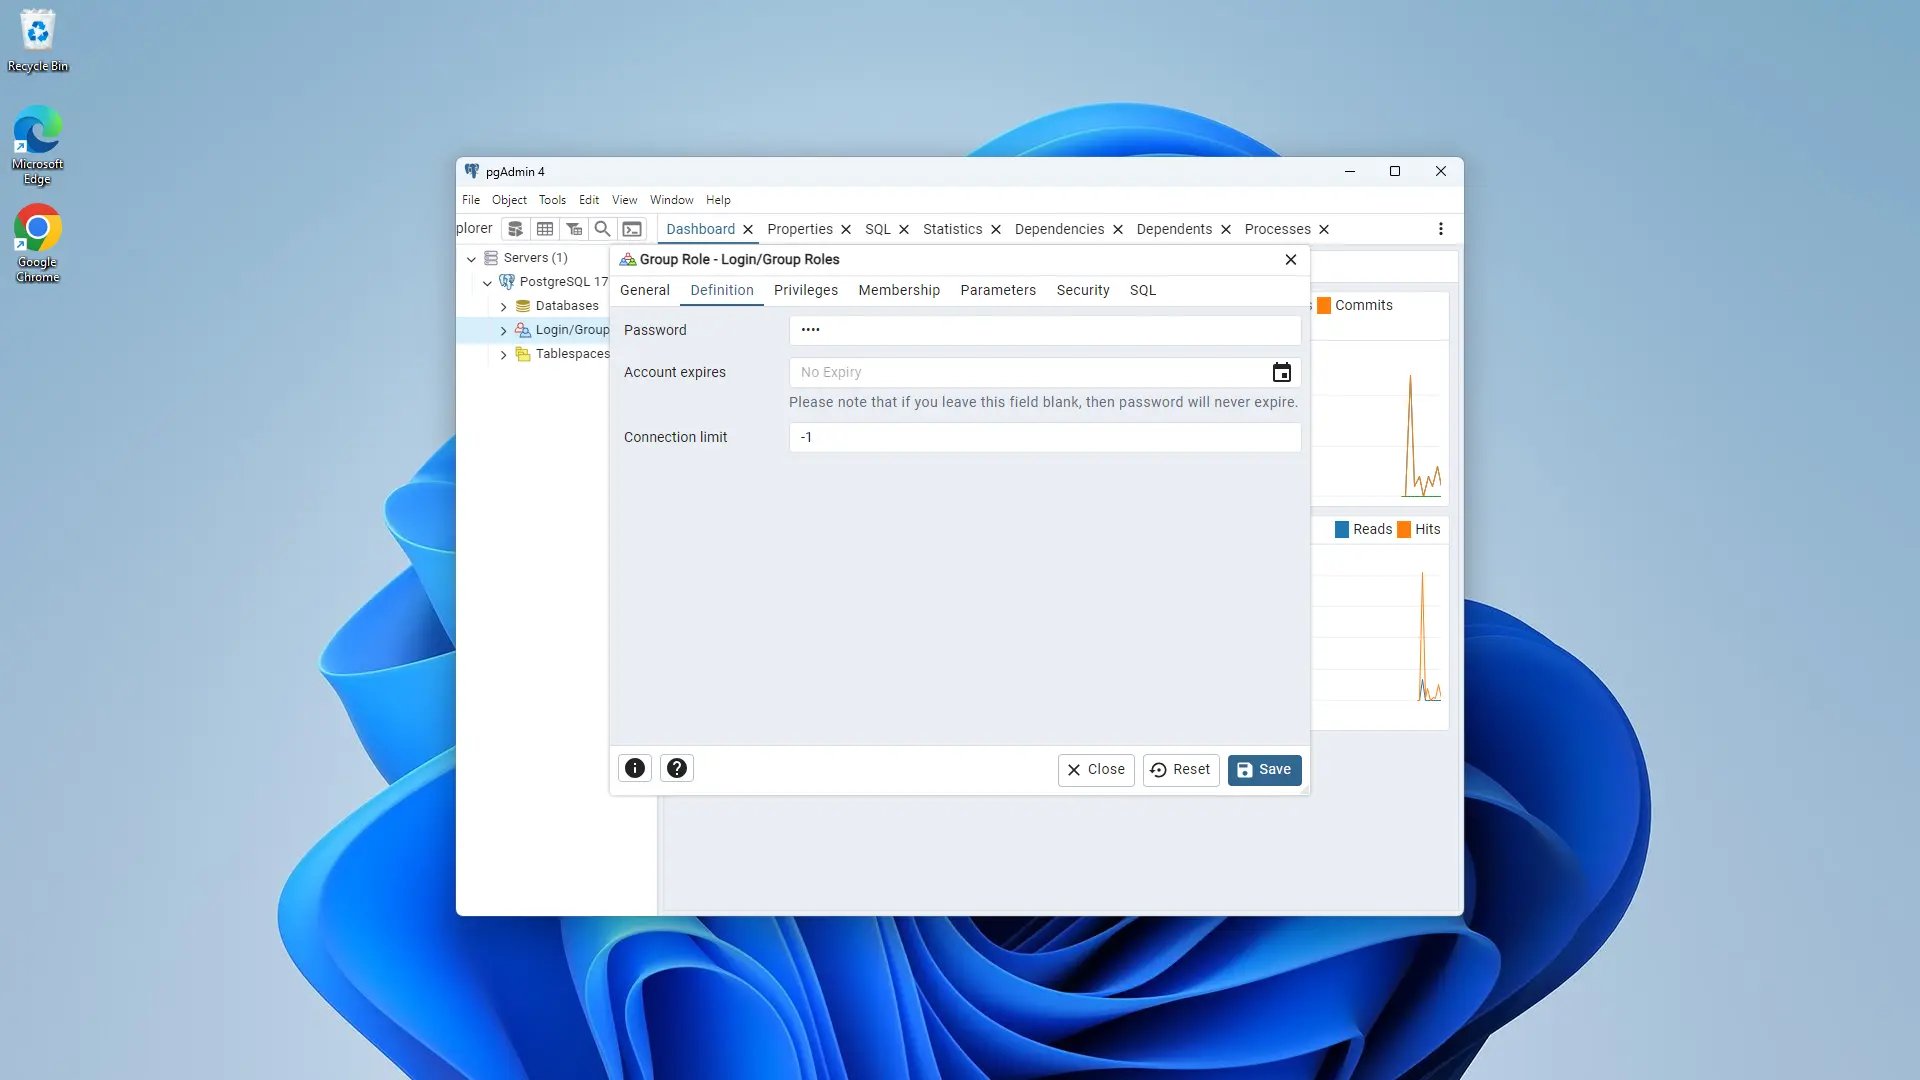
3. Set a password in the Definition tab.
4. Enable all options in the Privileges tab and save
your changes.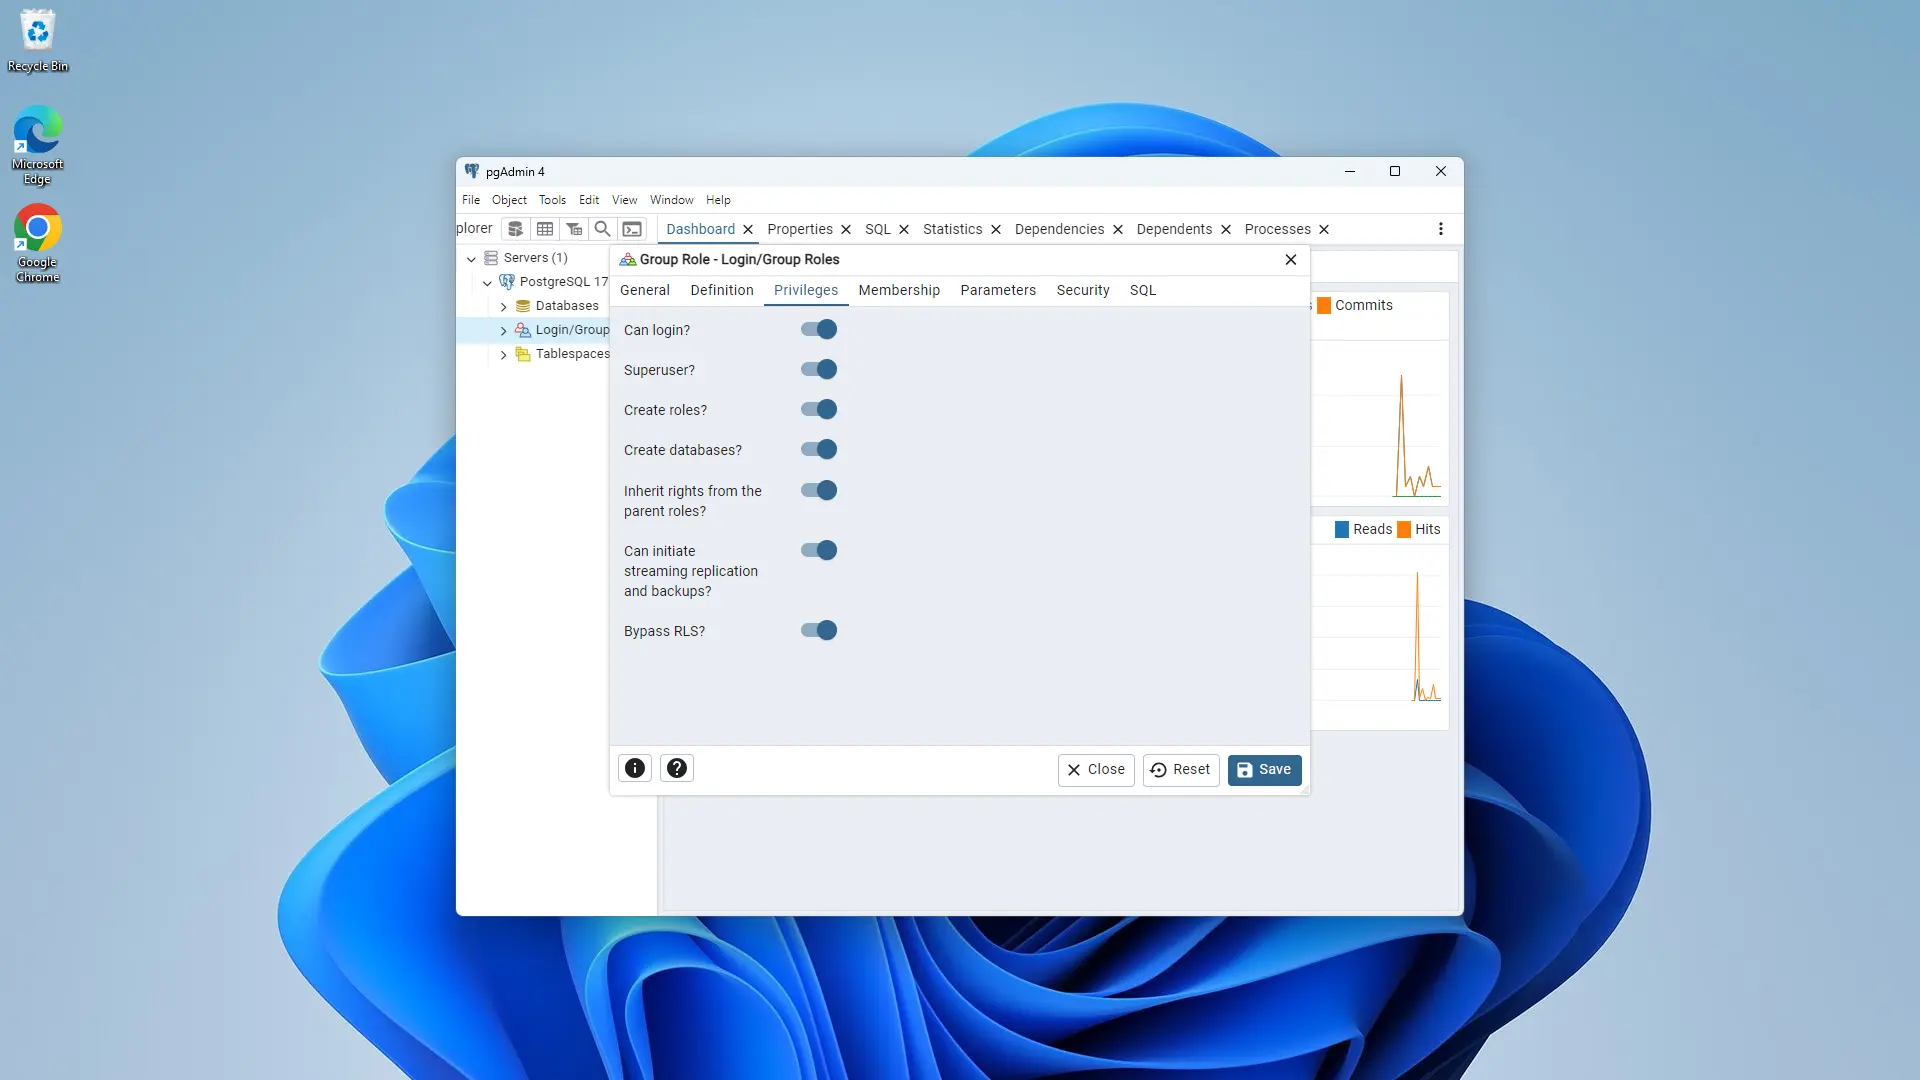
Step 4: Installation of the C++ kit using Visual Studio Tools
C++ is a core language for developing Windows applications, and Visual Studio provides a complete set of tools and libraries that simplify the creation of Windows desktop applications, services, and components using C++.
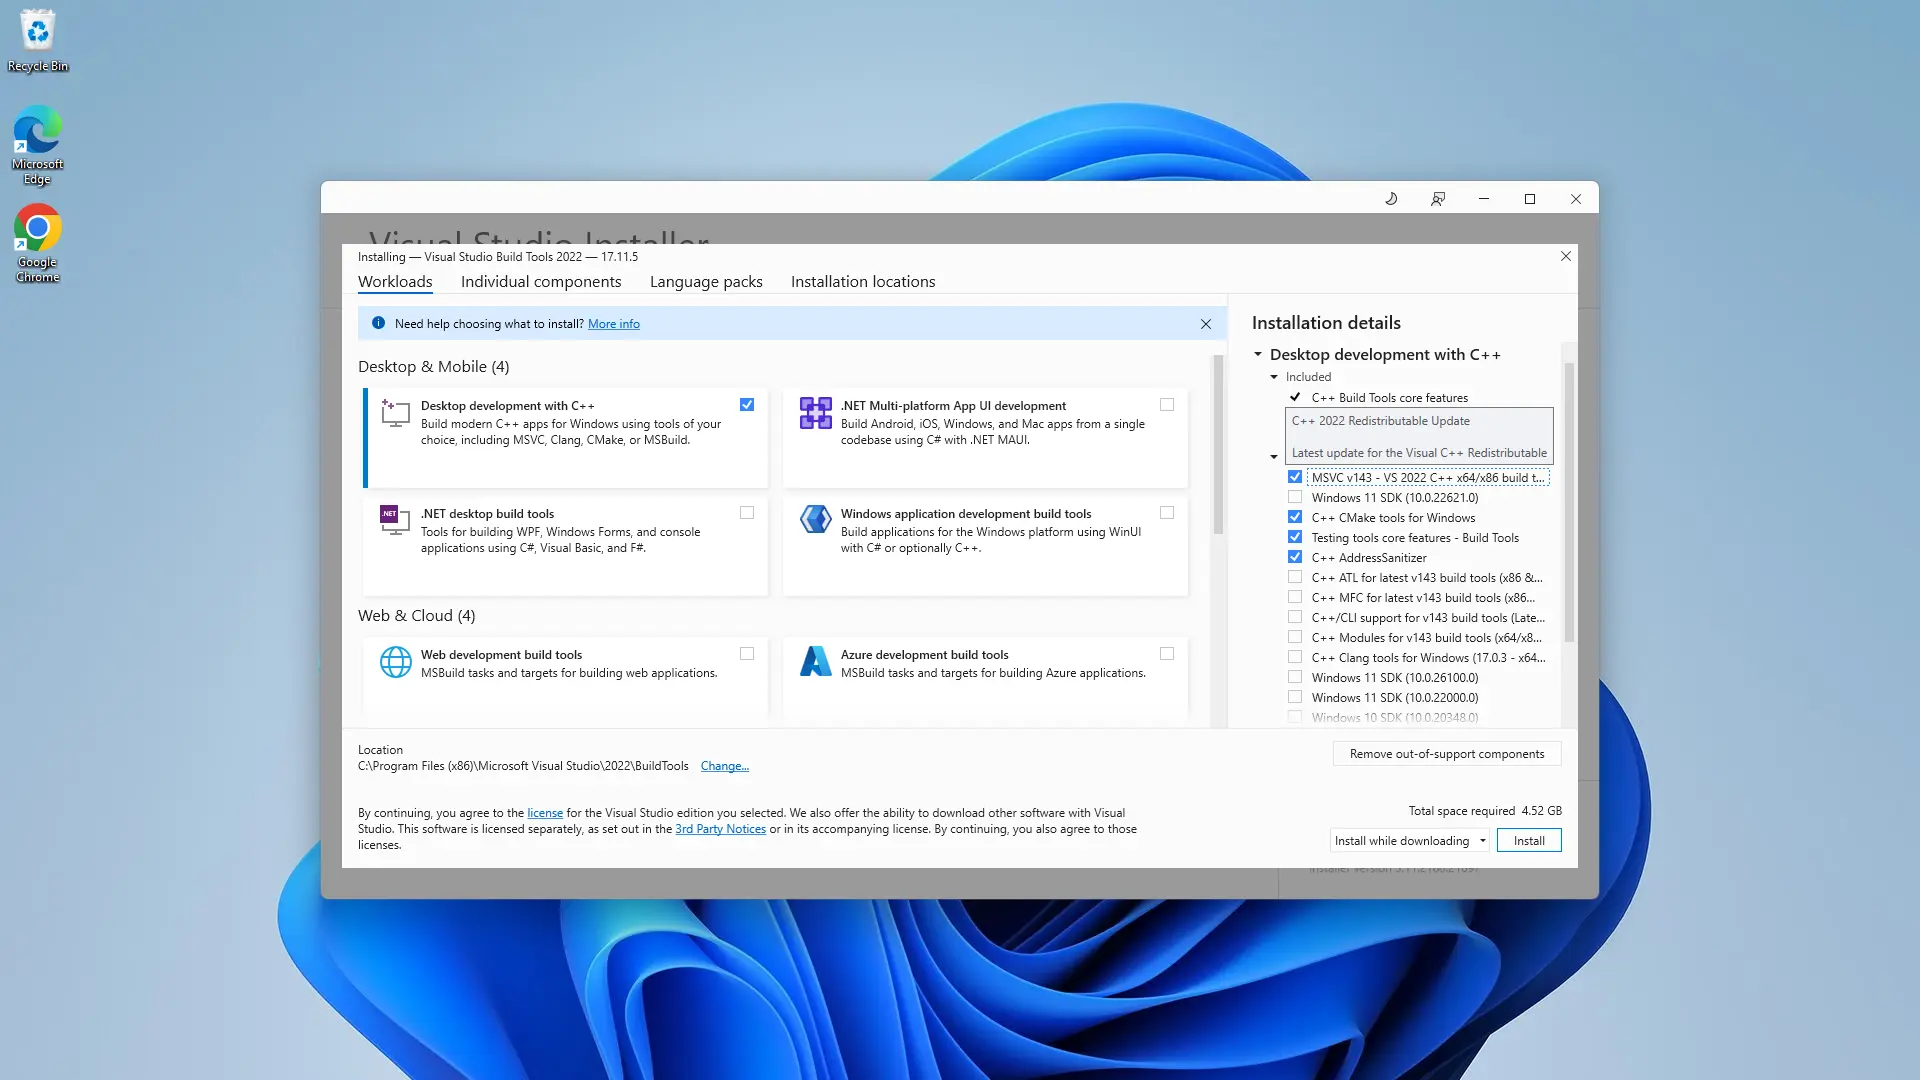
1. Download the C++ Build Tools installer directly from the official website https://visualstudio.microsoft.com/visual-cpp-build-tools/.

2. During installation, select "Desktop Development with C++" and choose any optional components as needed.
Step 5: Download Odoo 18 from GitHub
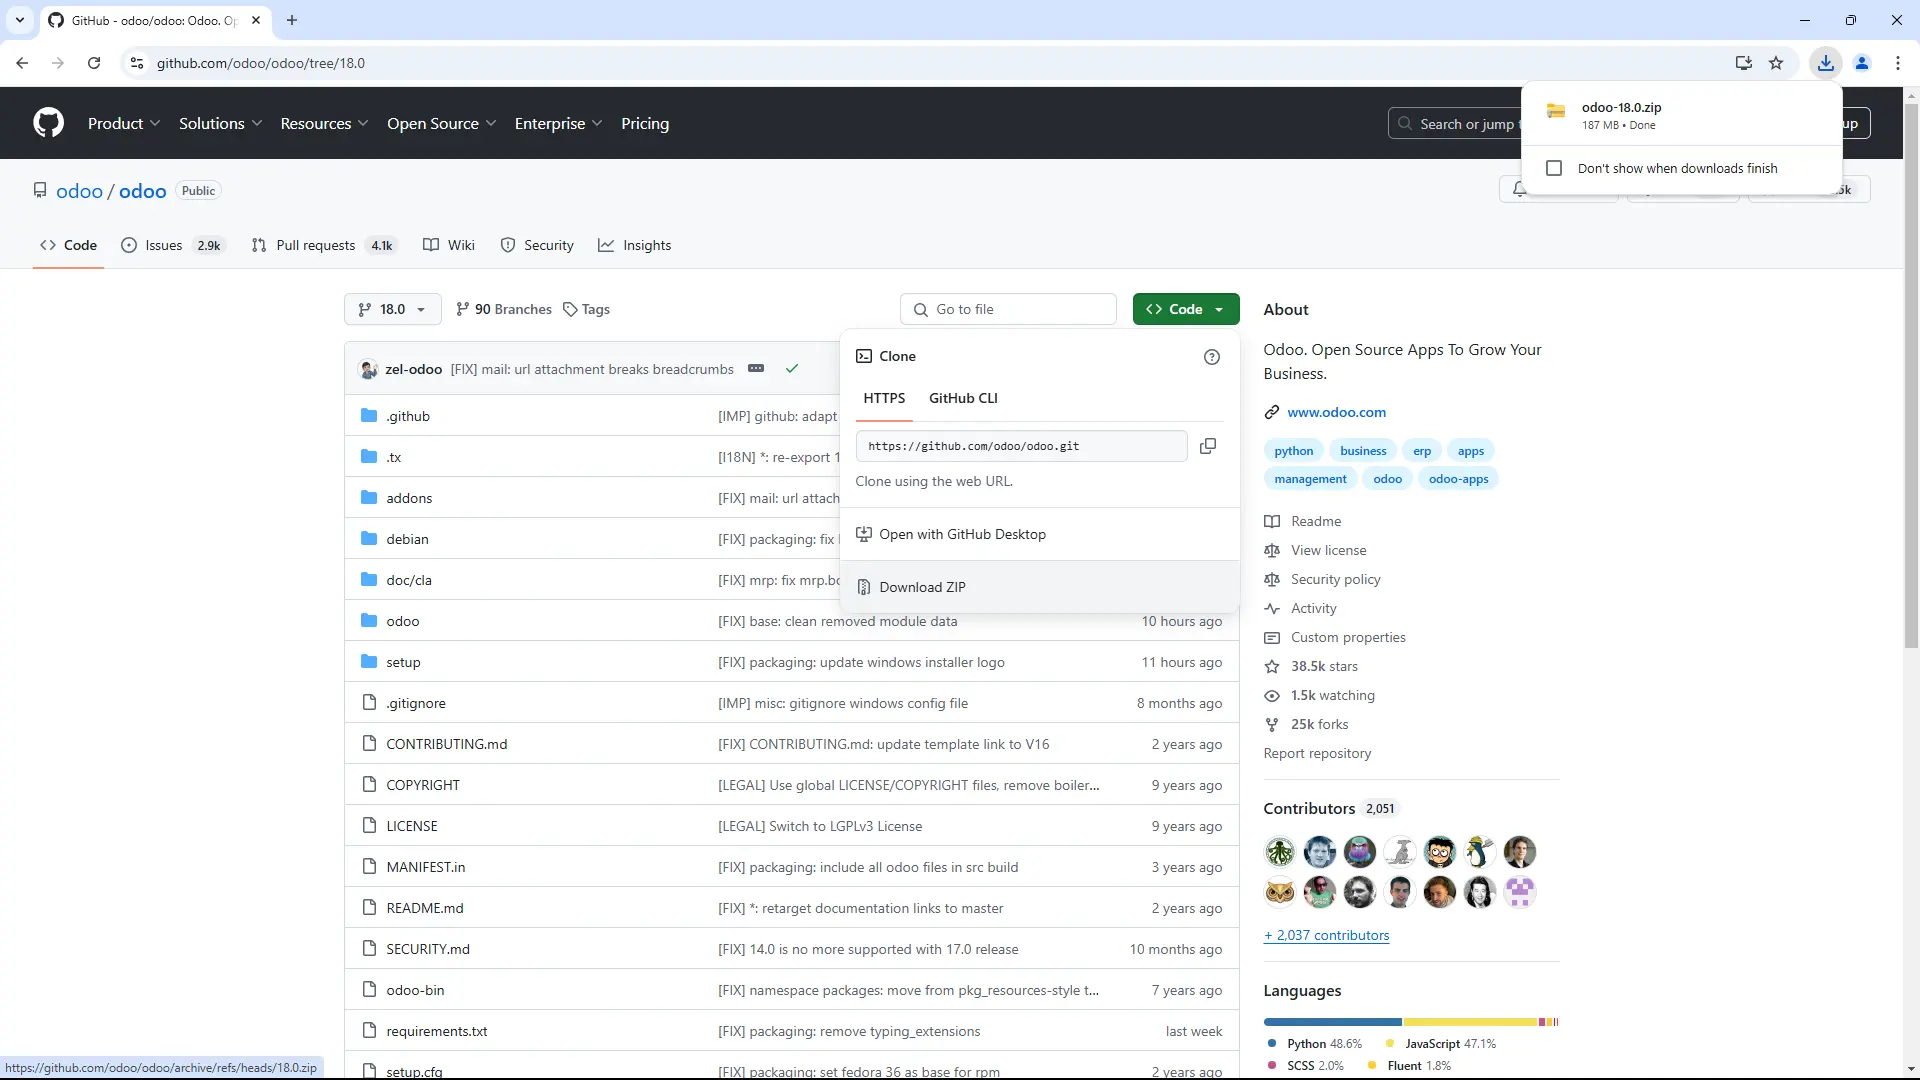
1. Download Odoo 18 from the Odoo GitHub repository
2. Once downloaded, extract the files to a preferred directory on your computer.
Step 6: Install PyCharm
1. Install PyCharm Community Edition from JetBrains' official website.

Step 7: Configure Odoo 18 Development Environment in PyCharm
1. Open PyCharm and select “Open Existing Project” to open the extracted Odoo 18 folder.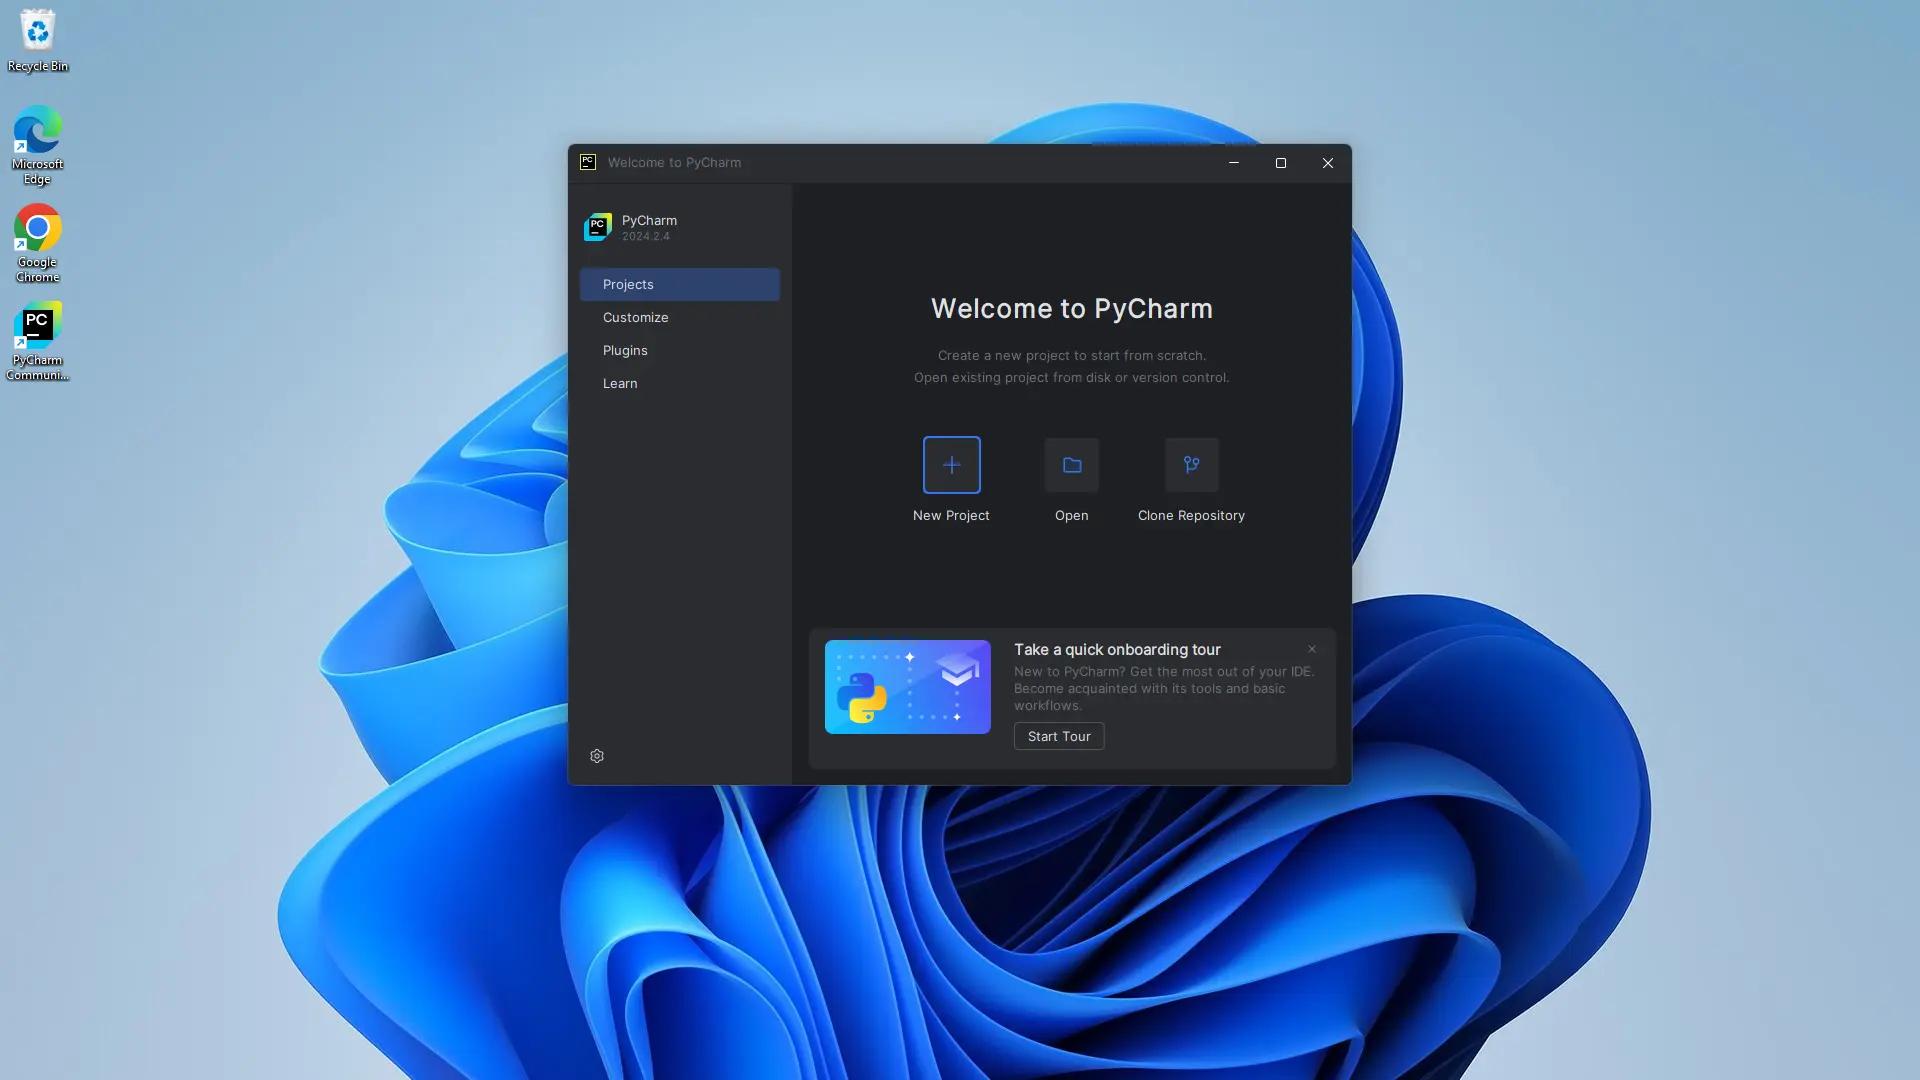
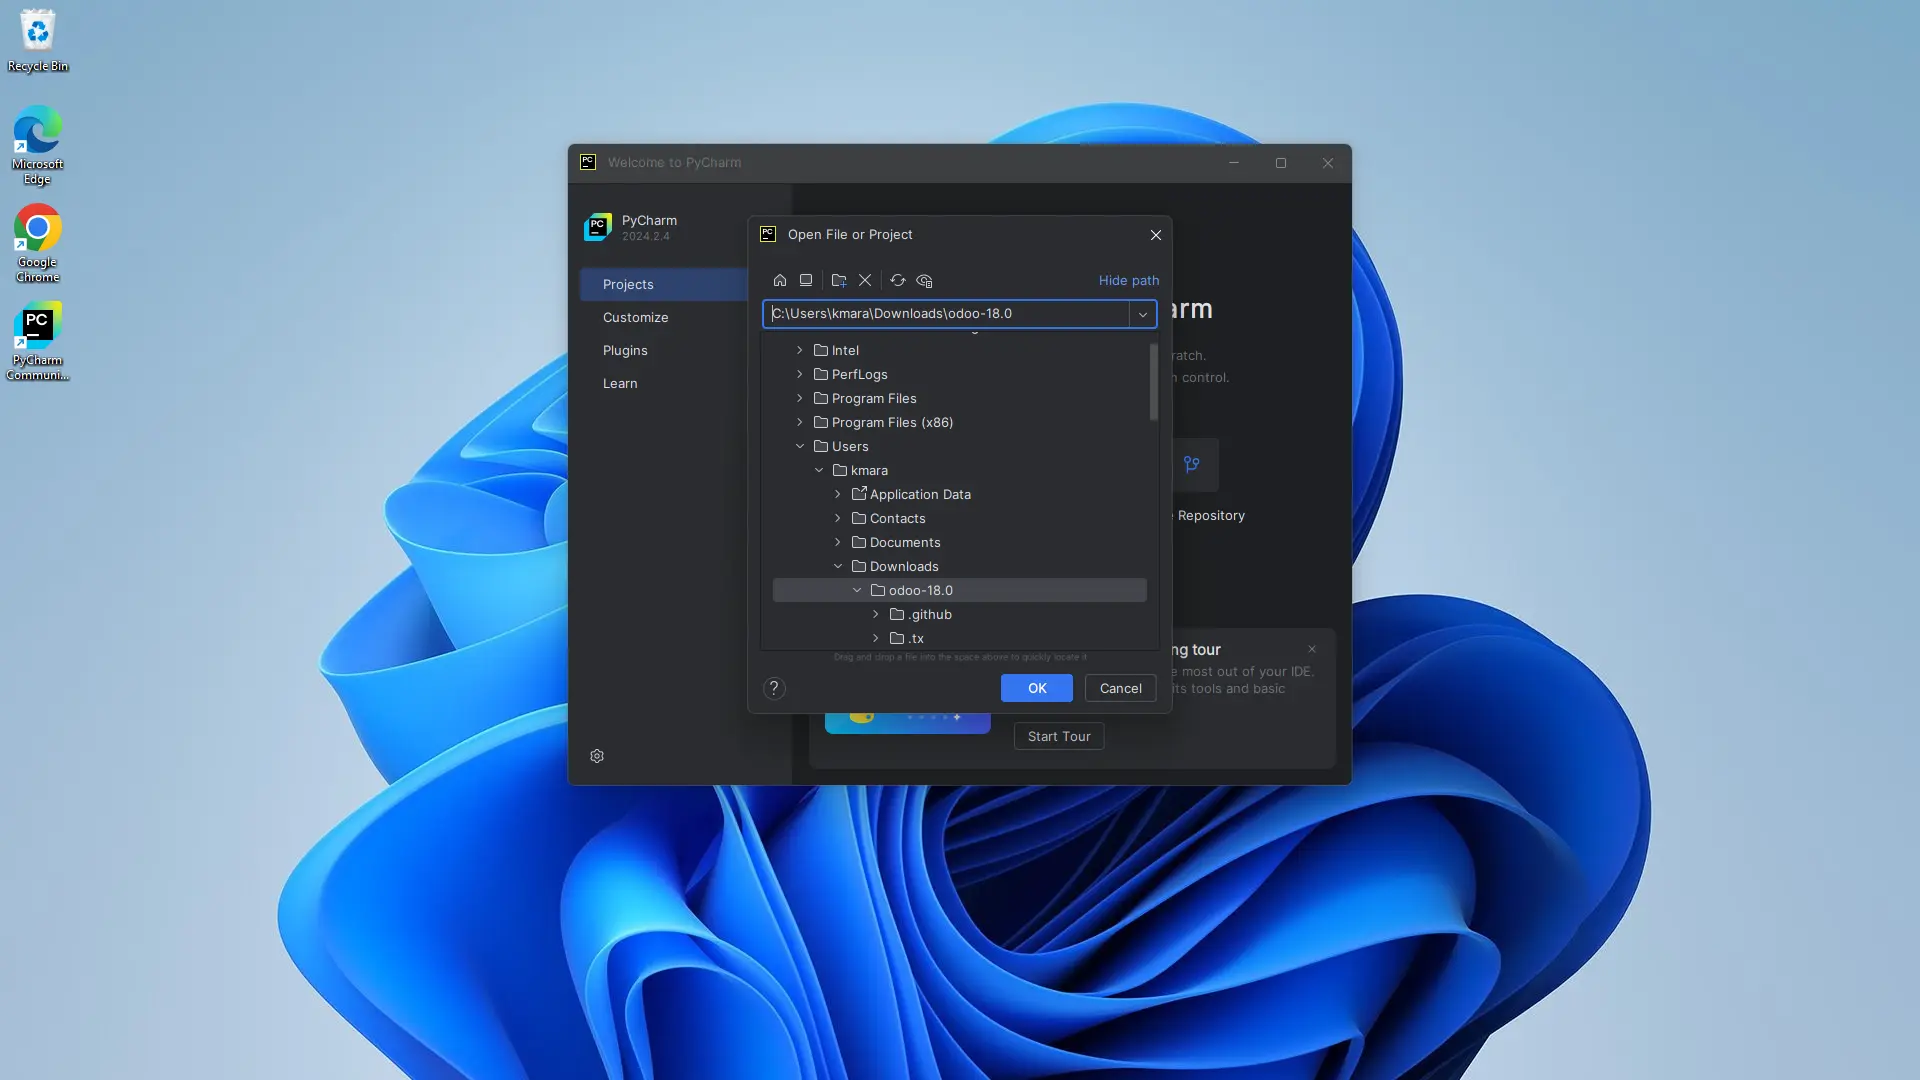
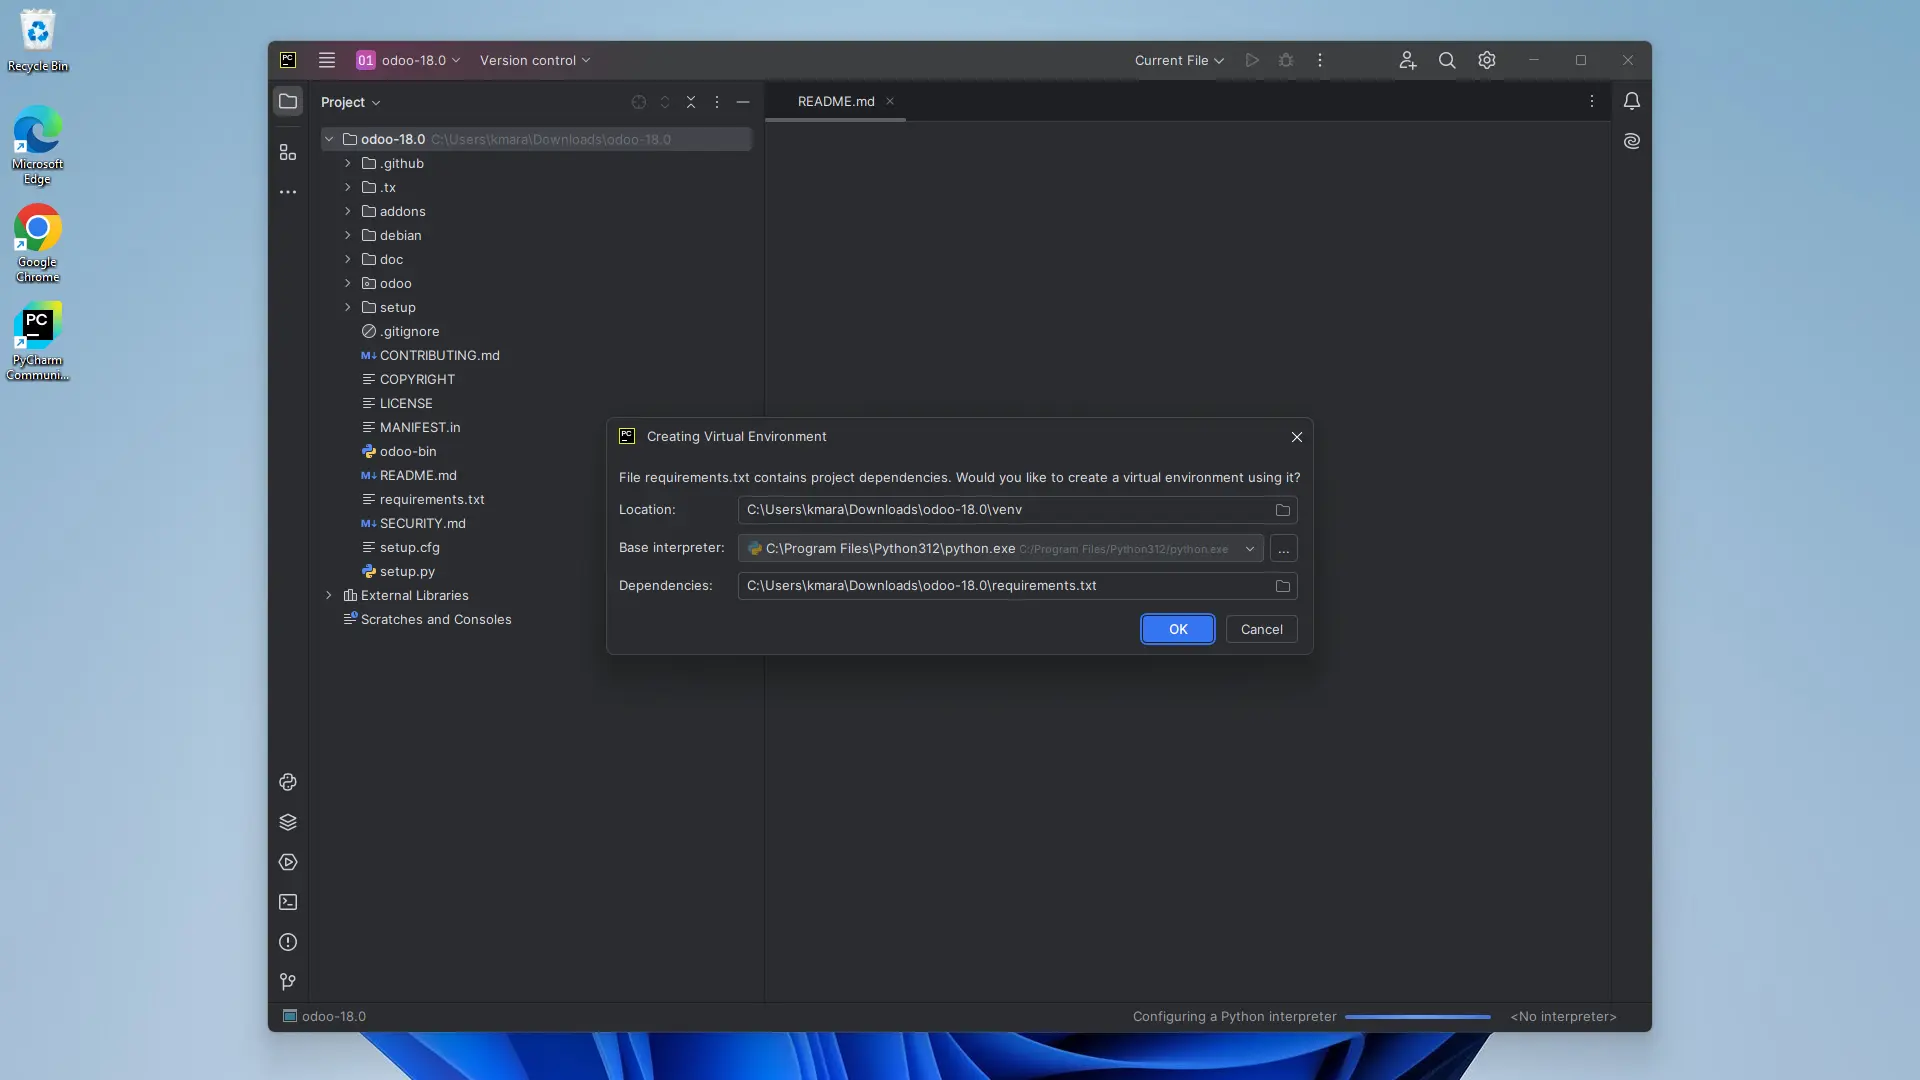
2. PyCharm will prompt you to create a virtual environment; select your base interpreter and create the venv.
3. Create an odoo.conf File
4. Inside this file, paste the below data
[options]
; Is This The Password That Allows Database Operations:
admin_passwd = admin
db_host = localhost
db_port = 5432
db_user = odoo
db_password = odoo
addons_path = /home/user/odoo/addons #change to you addons path
xmlrpc_port = 8017
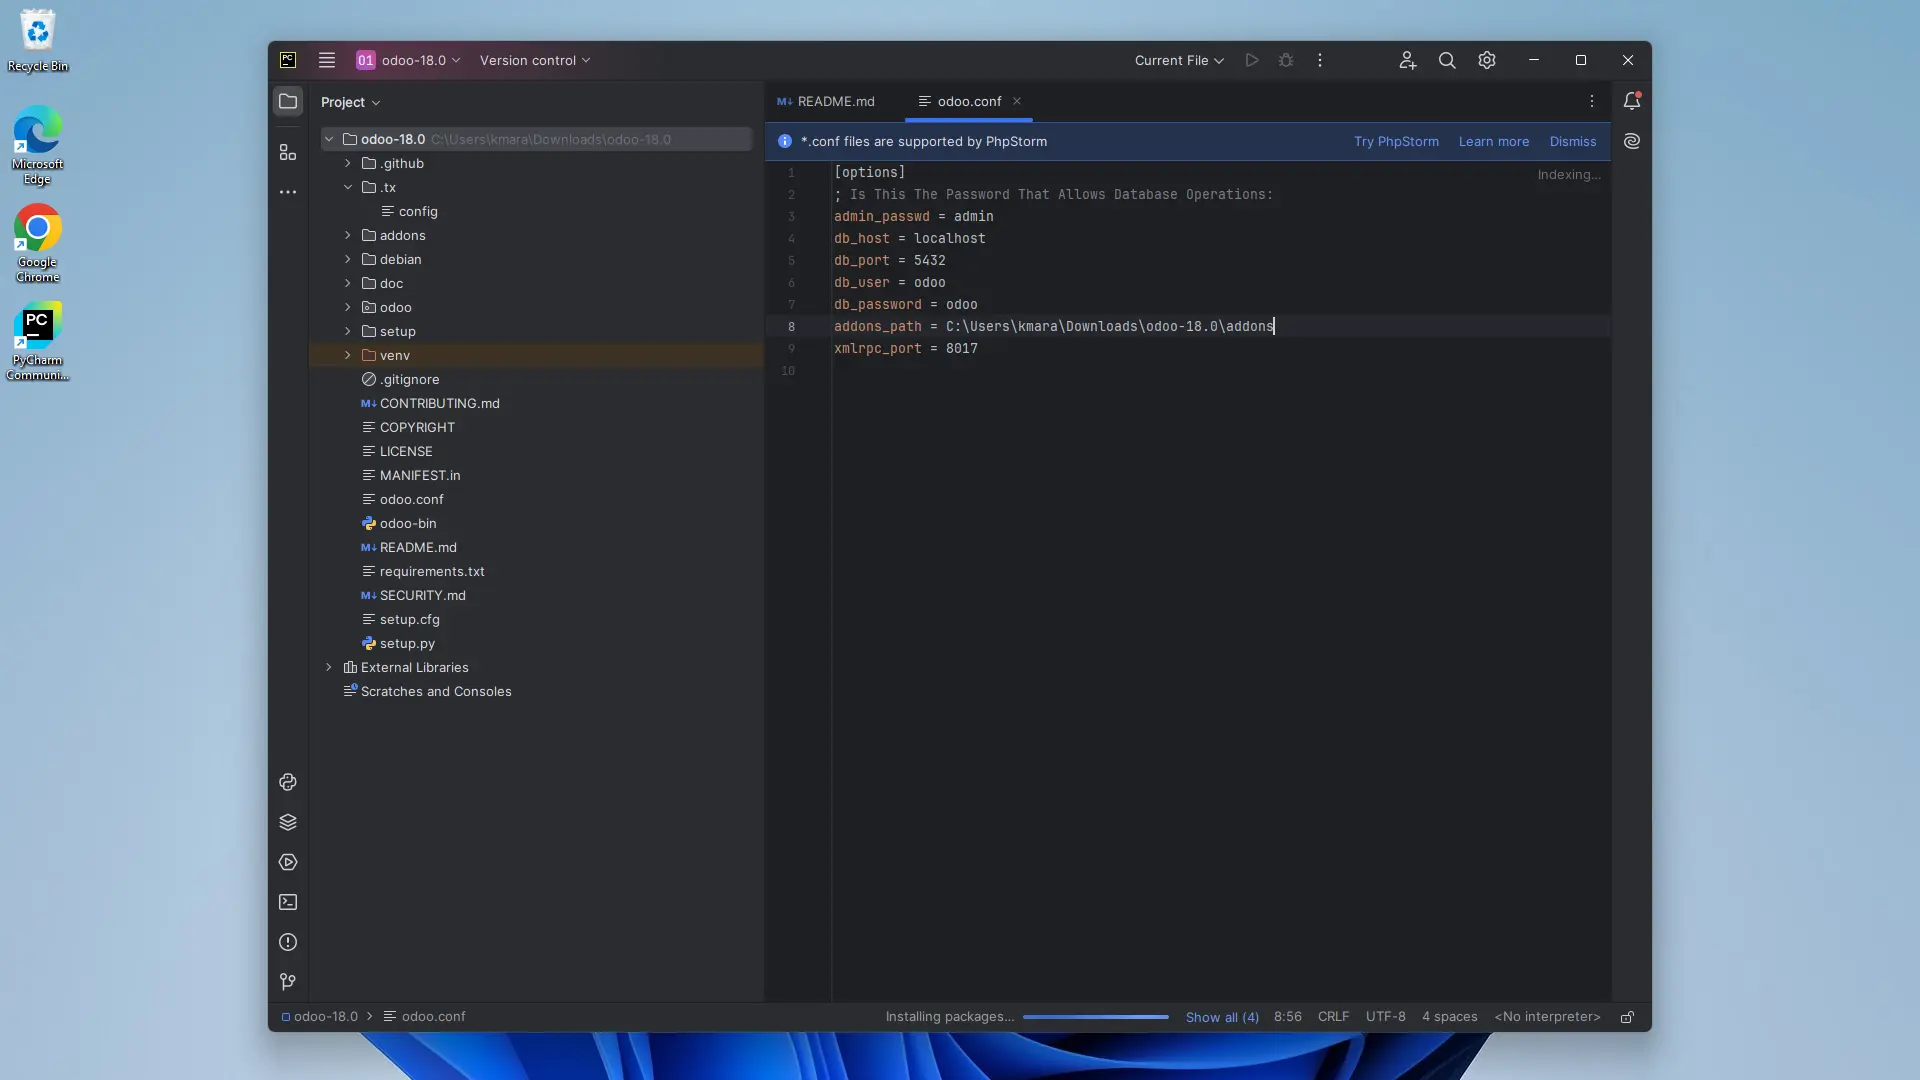
5. Change the db_user and db_password that were set when configuring PostgreSQL using pgAdmin.
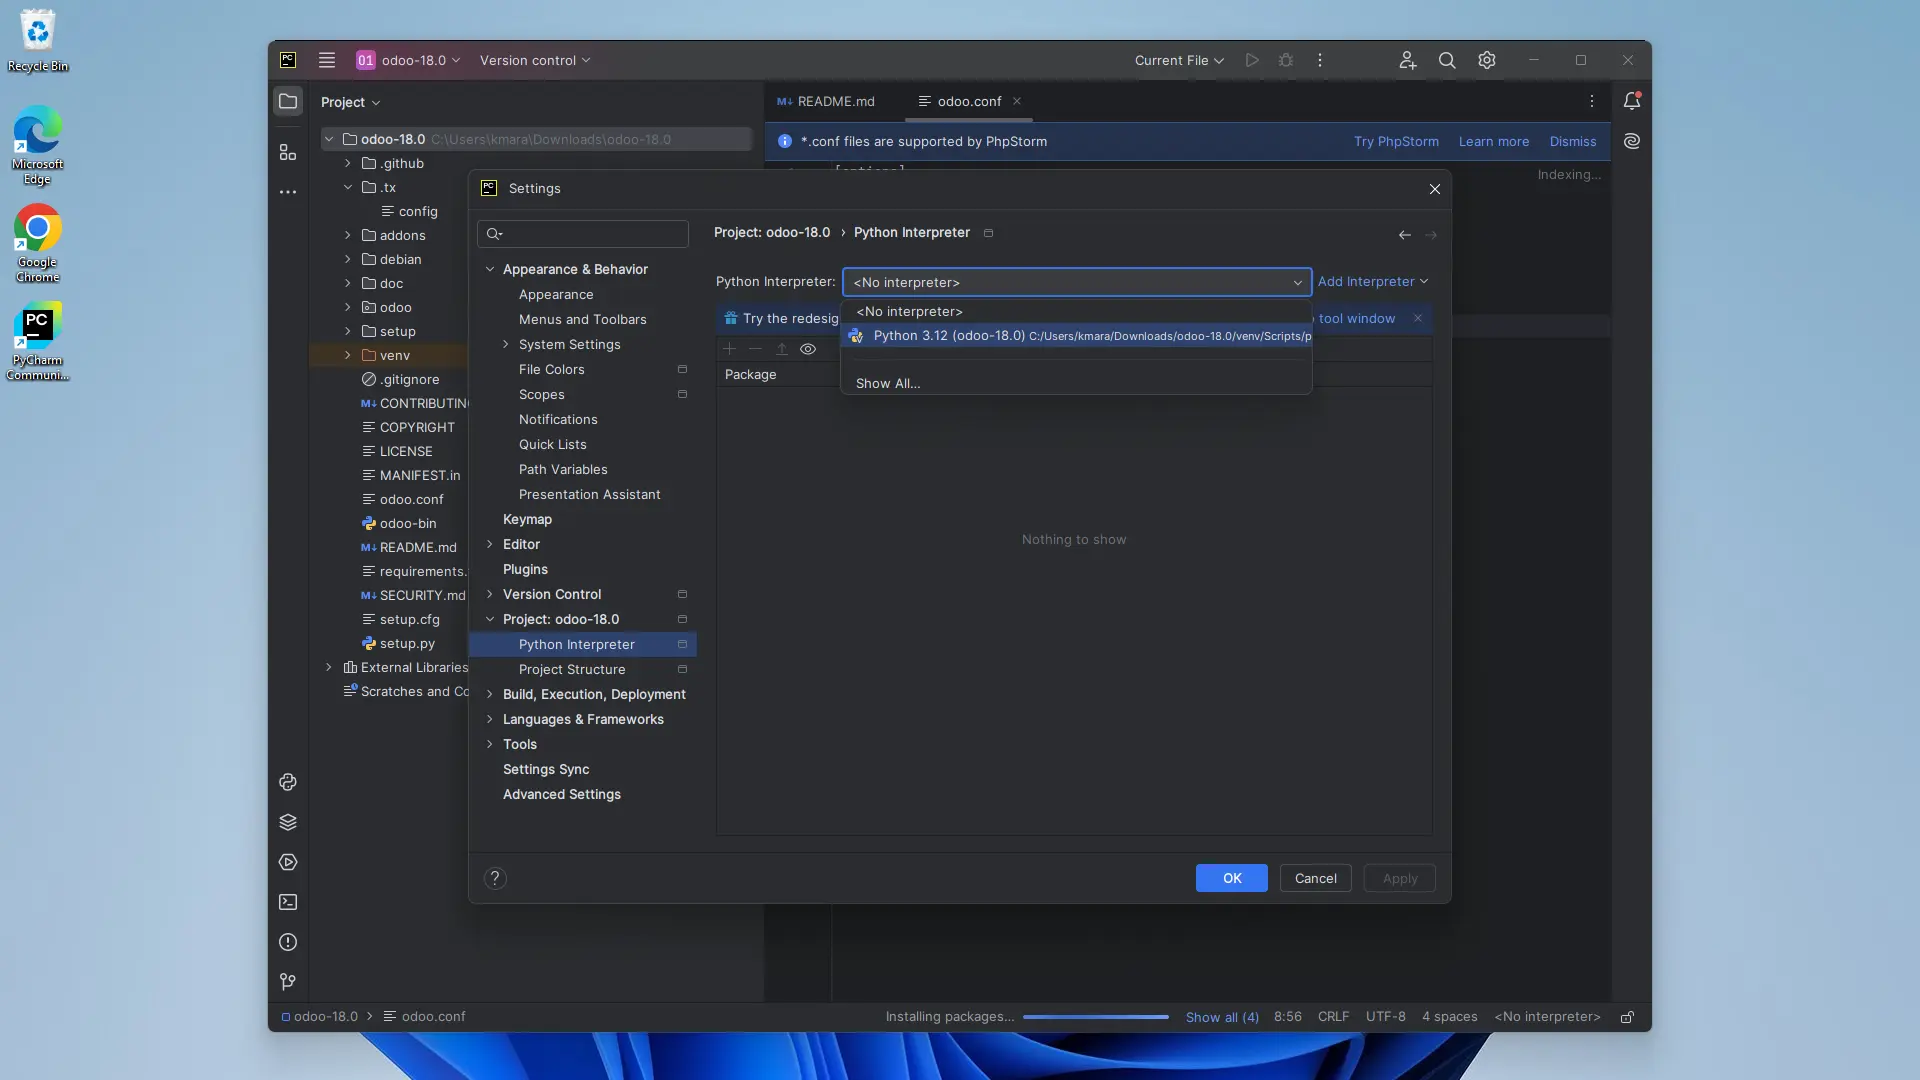
6. Set up a Python interpreter by going to Settings -> Project Settings -> Python Interpreter. Then, select the odoo18 virtual environment (venv) interpreter.
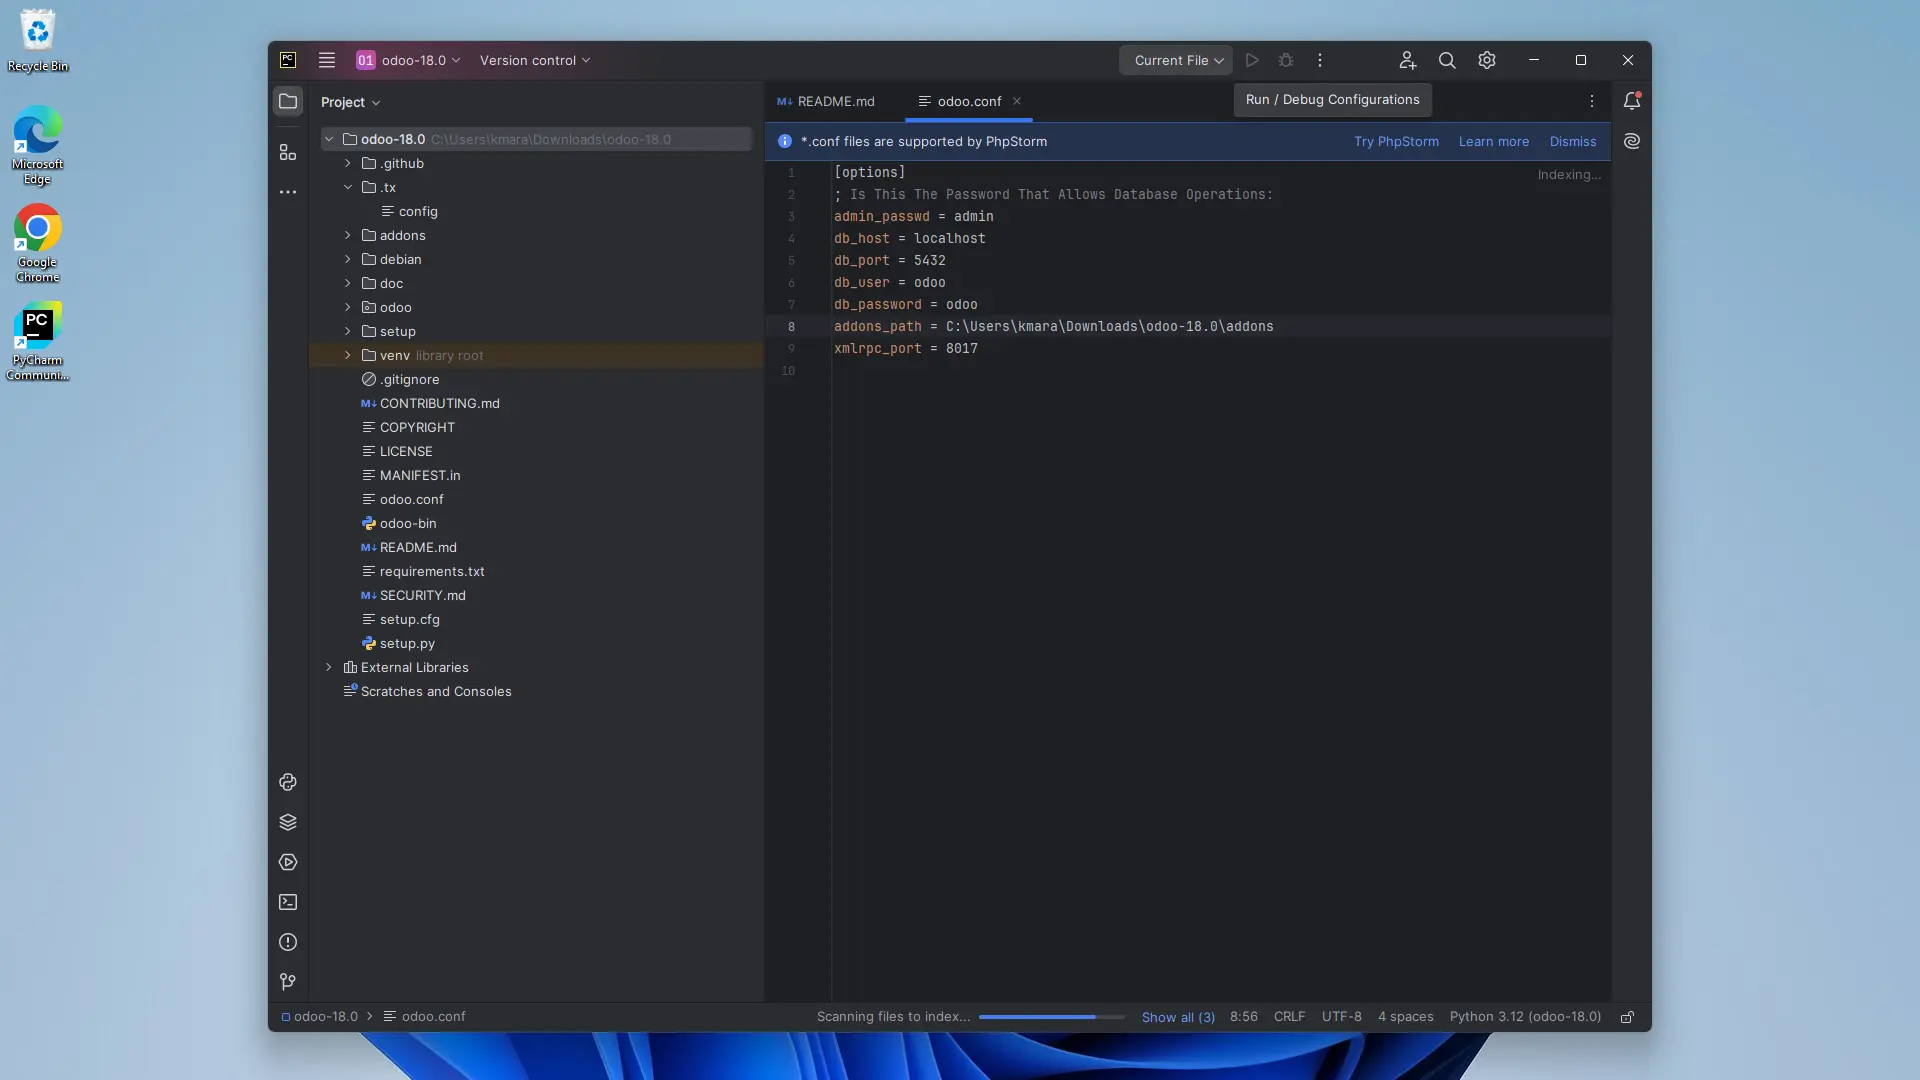
7. Create a configuration to run the Odoo18 instance by selecting Edit Configuration under the Current file option.
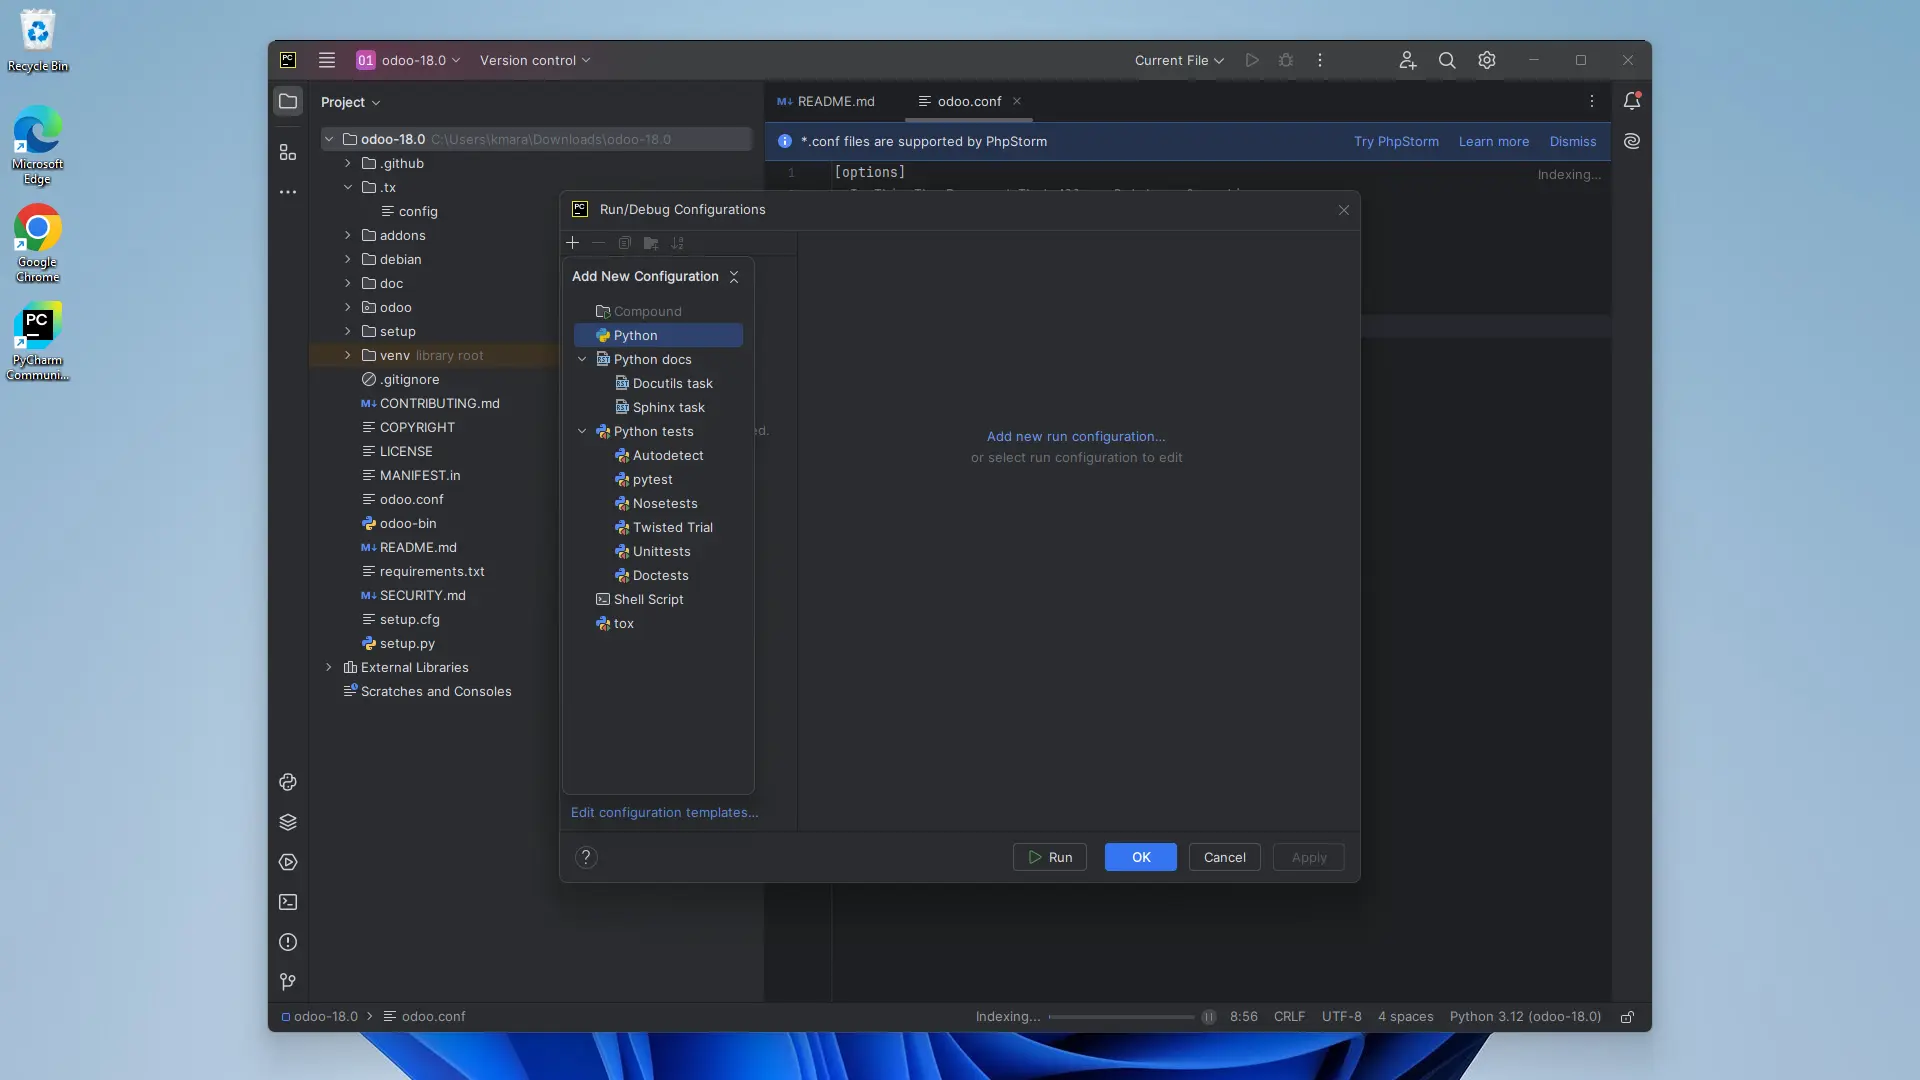
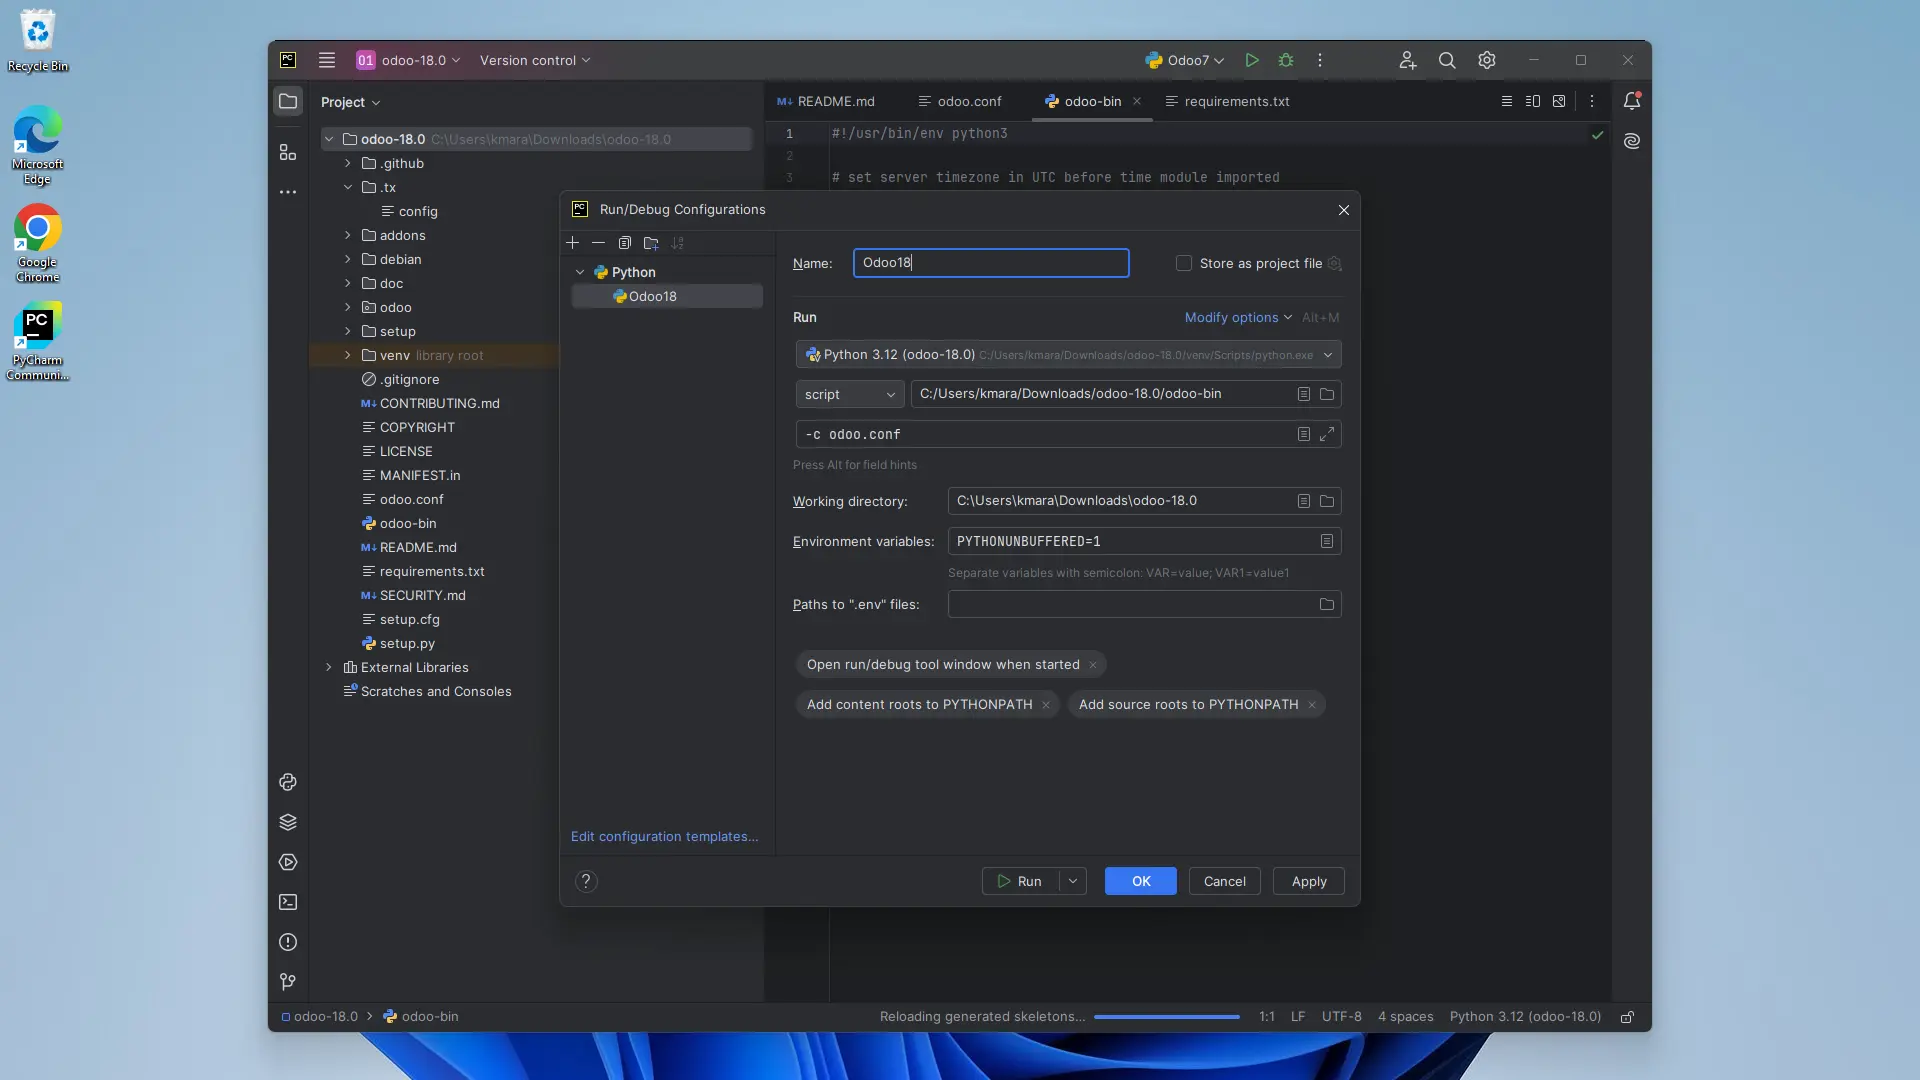
8. Use the Plus(+) icon in the top left panel to add a new configuration, then select Python from the available options:
+ Enter a name for the configuration.
+ Set the Script path to the 'odoo-bin' file in the extracted Odoo-18 project directory.
+ Specify the Python interpreter if it’s not already displayed.
+ For the Working directory, select the extracted project folder.
+ In Parameters, enter: '-c odoo.conf'
Finally, click Apply, then OK.
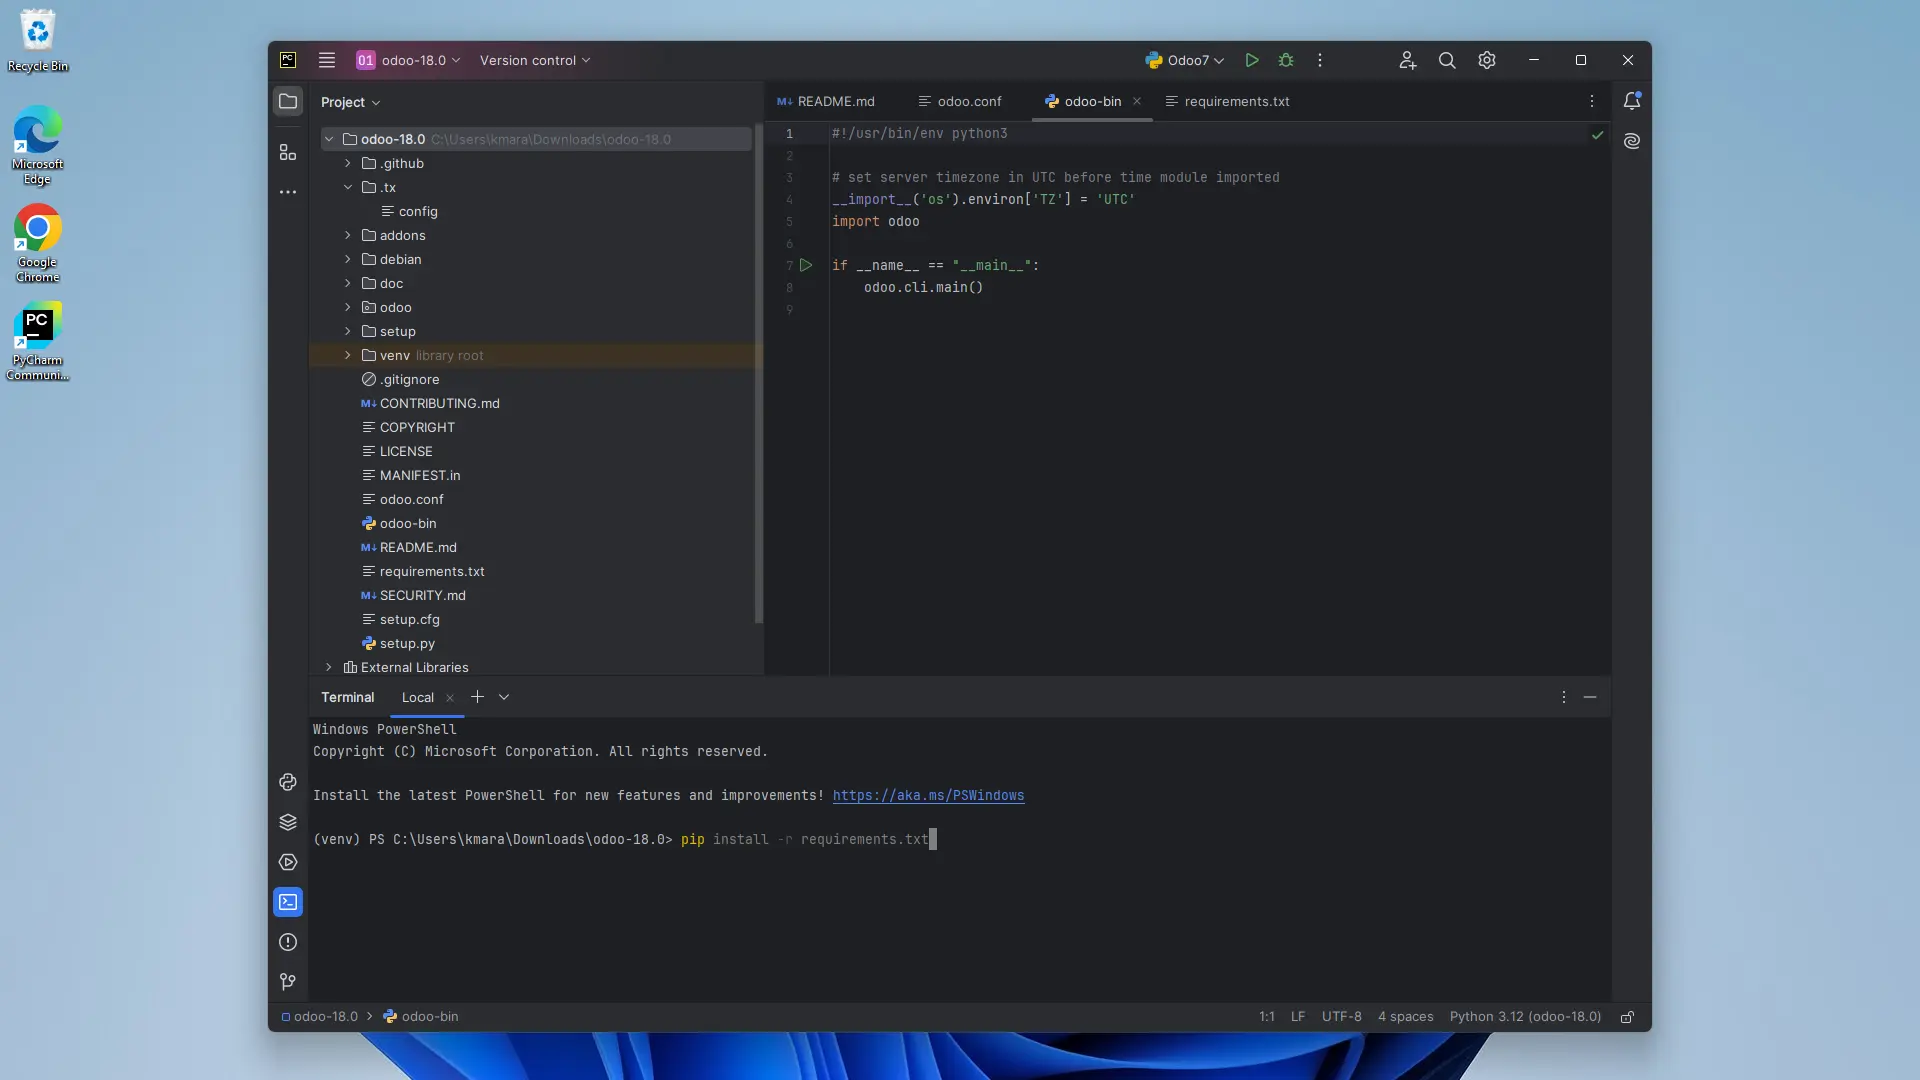
9. Activate the virtual environment (venv) and install requirements.txt.
10. After installation, run the application and go to localhost: 8017 to set up a new database.
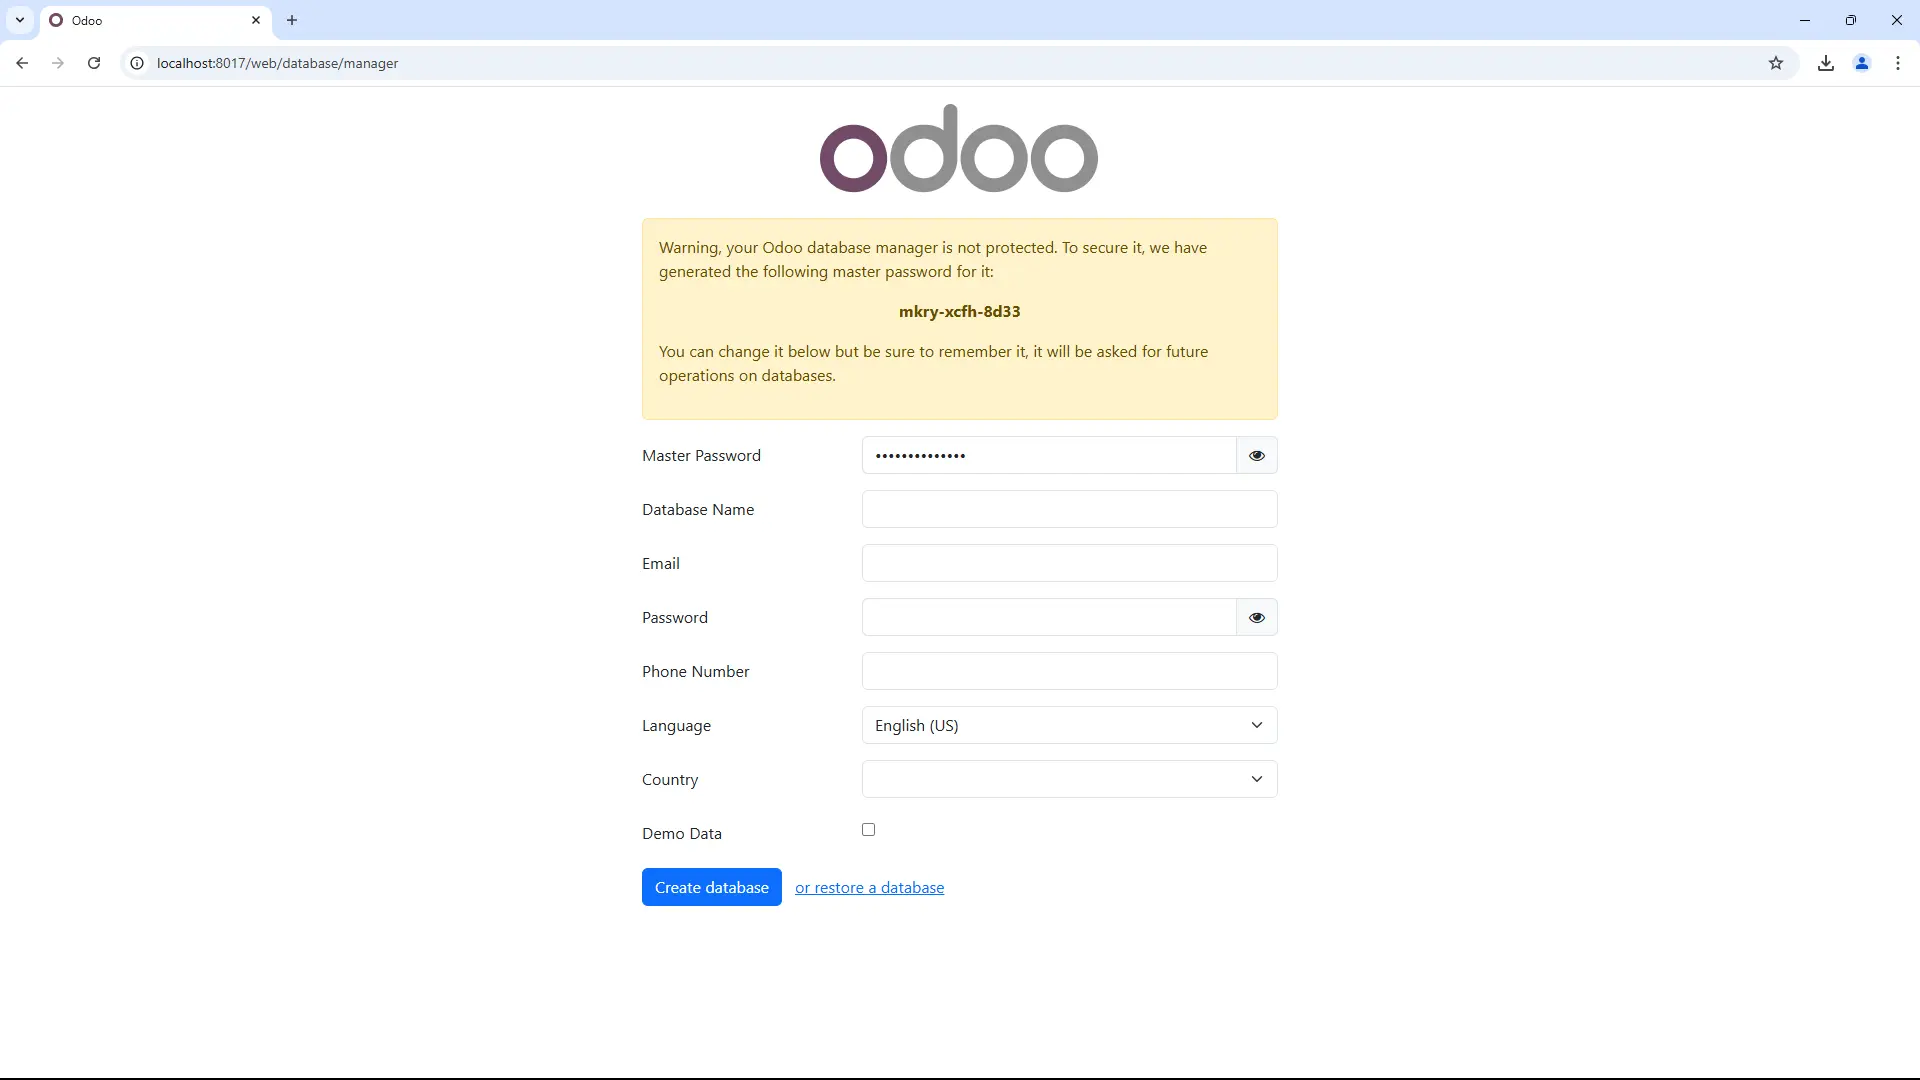
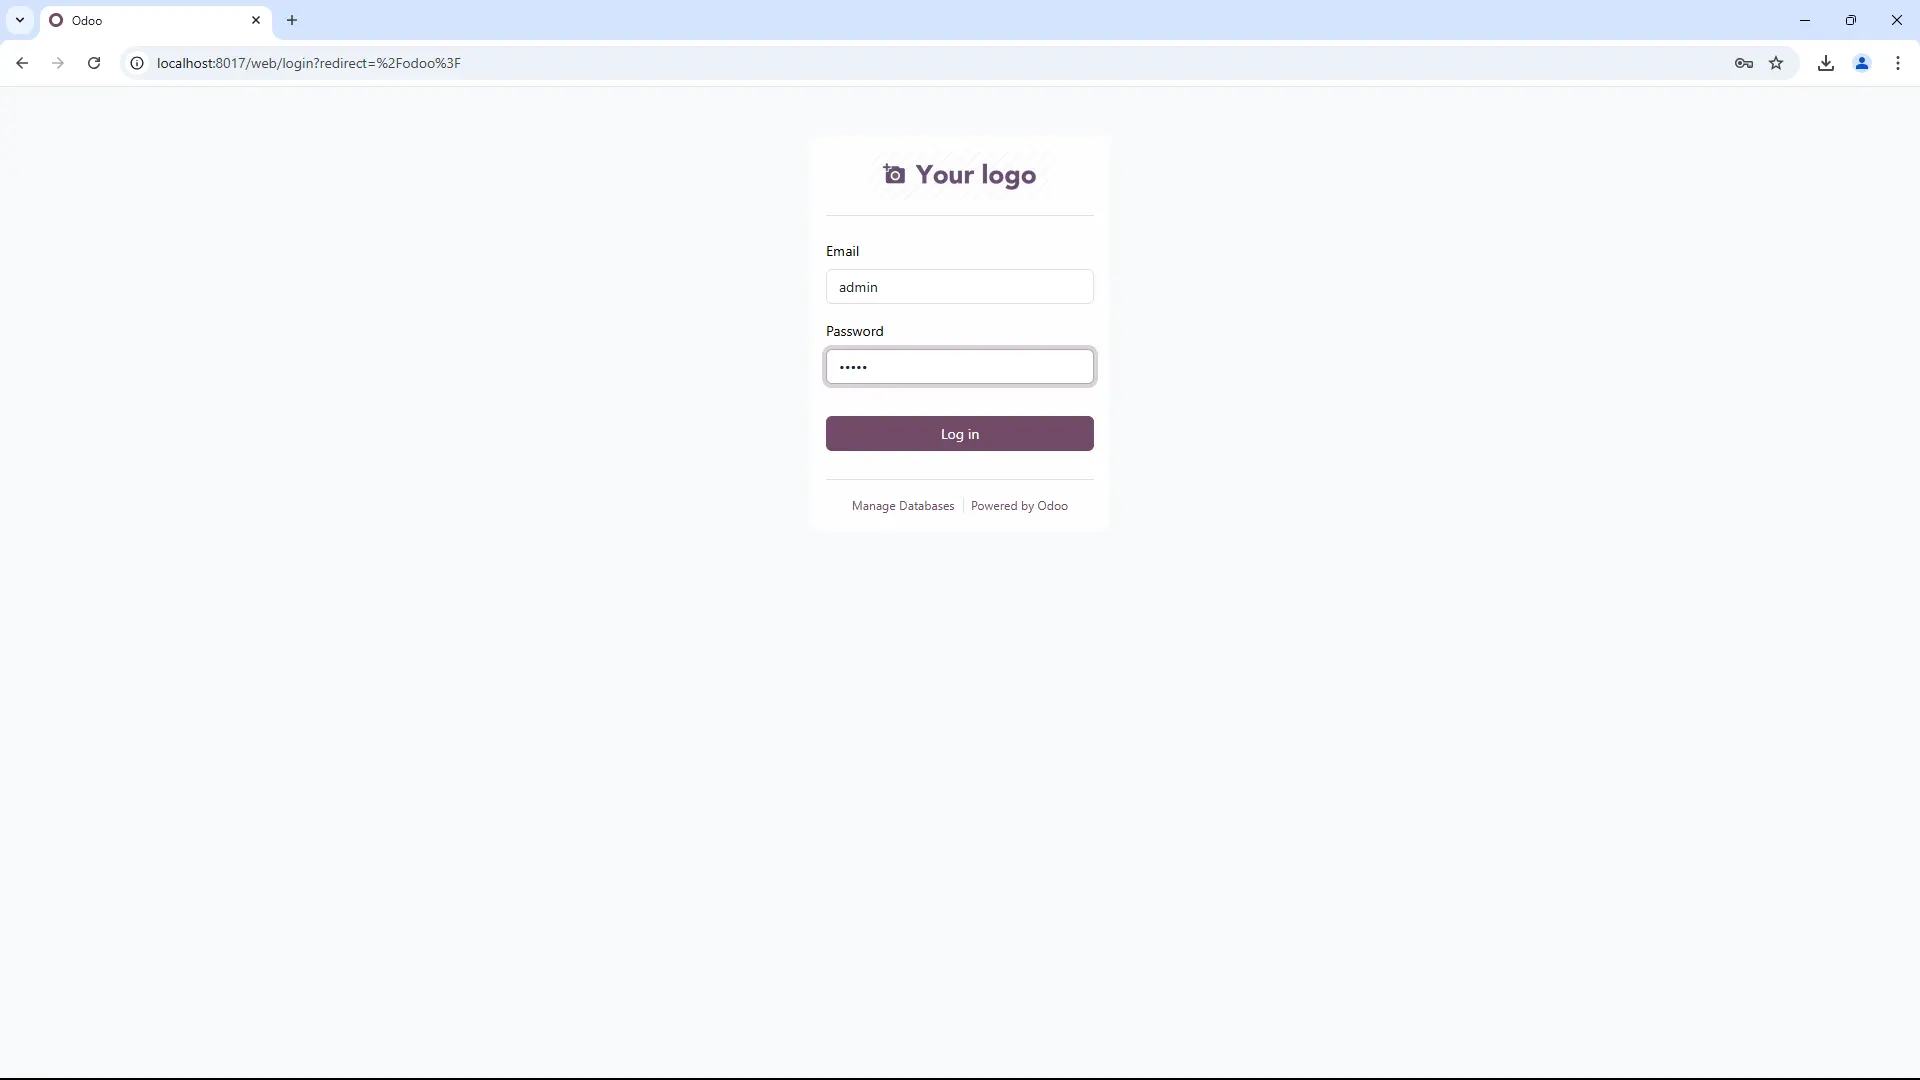
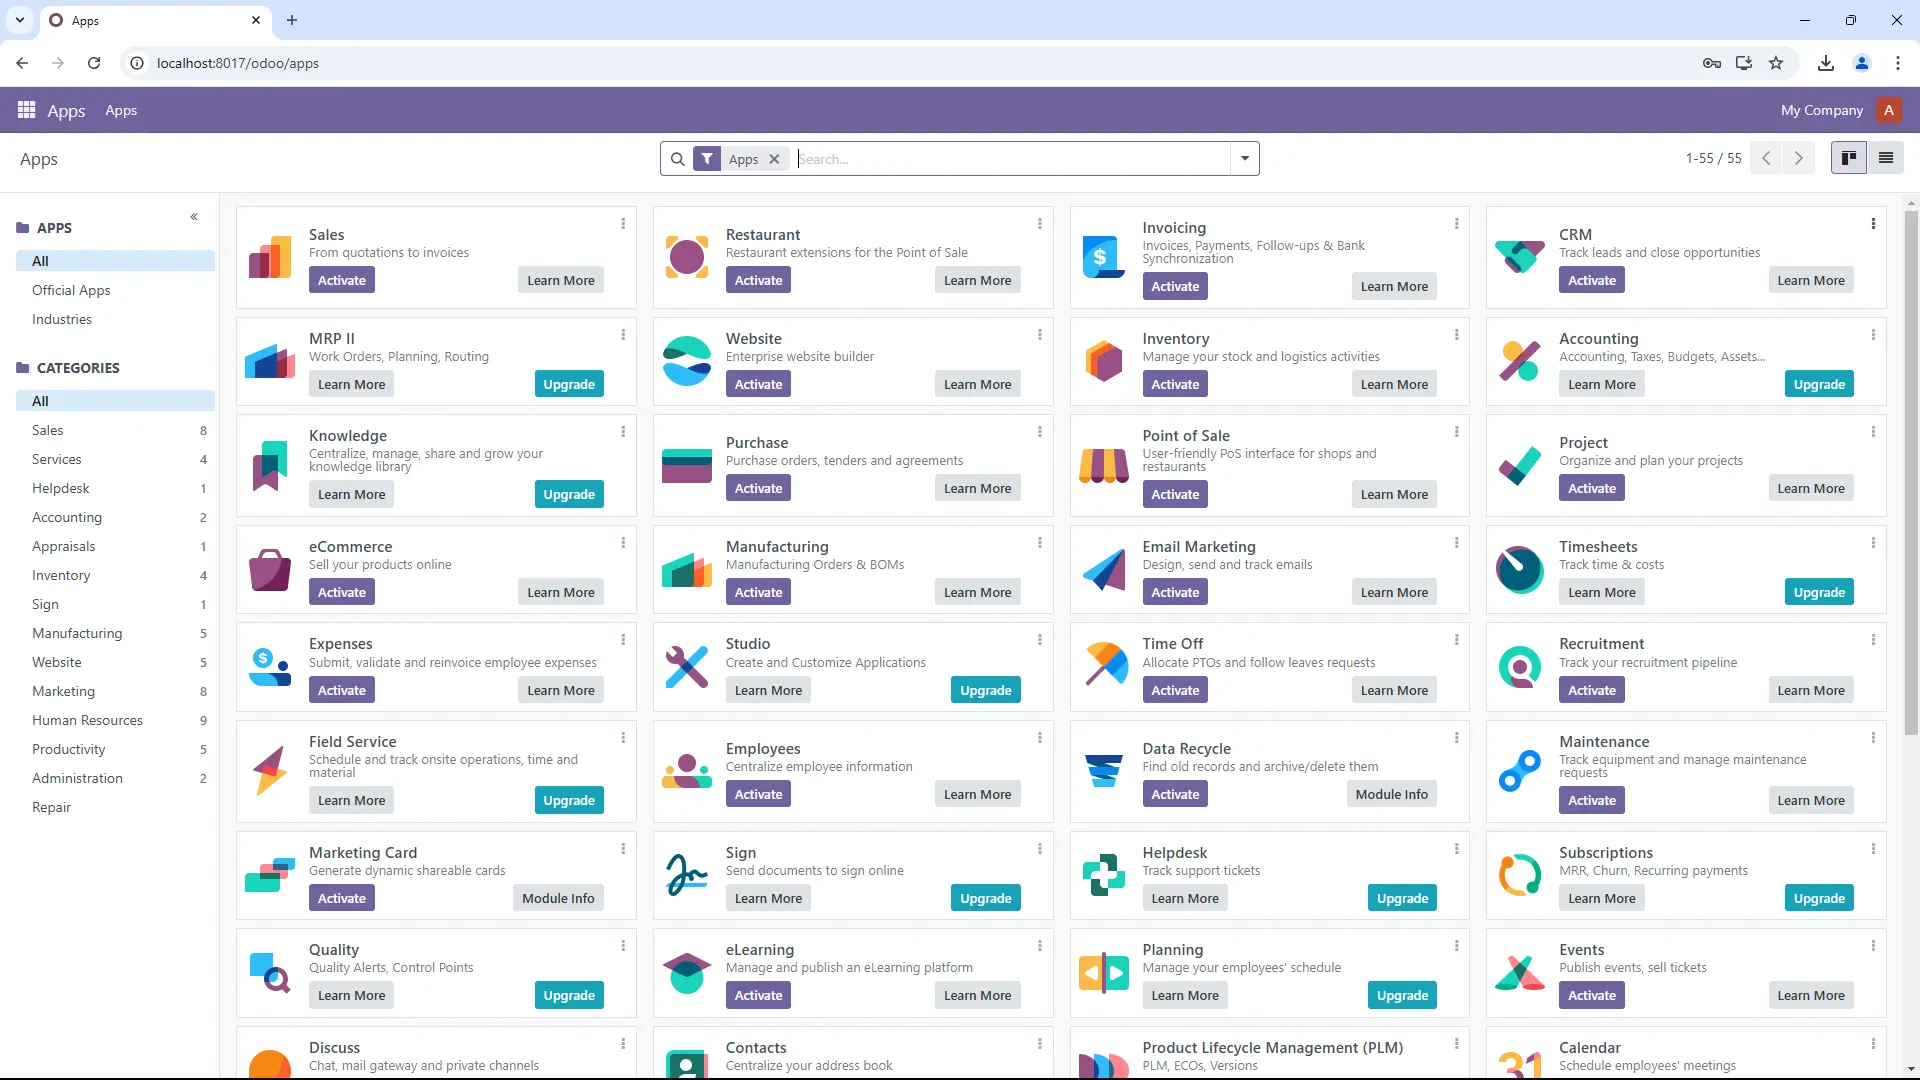
11. Once the database is set up, log in using the credentials you created
Conclusion
Installing Odoo 18 on Windows might feel tricky initially, but by following these steps carefully, you can set up this powerful ERP system in no time. Odoo’s features will help you simplify business processes. Regular updates and maintenance will ensure optimal performance, allowing you to maximize productivity and efficiency in your operations.
Remember that having a reliable support system is crucial for troubleshooting any issues that may arise during installation or usage. If you need any help or custom solutions, our team of certified Odoo developers is here to assist you with tailored services that meet your business needs. Contact us Today!
#Odoo18 #Odoo18Installation #odoo18windows #odoo18guide