Odoo 18 is a powerful open-source business management software that can help you streamline your business operations. If you’re a Mac user and want to install Odoo 18 without technical complications, this guide will walk you through the process step by step. Following these instructions, you can set up Odoo 18 even with minimal technical knowledge.
Prerequisites
Before you begin, ensure you have the following installed:
- Homebrew (package manager for macOS)
- Python (compatible version for Odoo 18)
- PostgreSQL (database for Odoo)
- Git (for cloning the Odoo repository)
If you haven’t installed these prerequisites yet, don't worry! We have provided the steps below for installing them. If you already have them installed, you can skip Steps 1, 2, 3, 4, and the Git installation part in Step.
Step 1: Install Xcode Command Line Tools
Open Terminal and run the following command to install Xcode command-line tools:
xcode-select –install
Step 2: Install Homebrew
If you haven’t installed Homebrew yet, it is the easiest way to install required packages like Python and PostgreSQL.
Run the following command:
/bin/bash -c "$(curl -fsSL https://raw.githubusercontent.com/Homebrew/install/HEAD/install.sh)"
After running the command, enter your password when prompted and follow the instructions to complete the installation.
Once installed, you need to add Homebrew to your PATH.
Run the following two commands in the terminal to do so:
echo 'eval "$(/opt/homebrew/bin/brew shellenv)"' >> /Users/<Mac user>/.zprofile
eval "$(/opt/homebrew/bin/brew shellenv)"
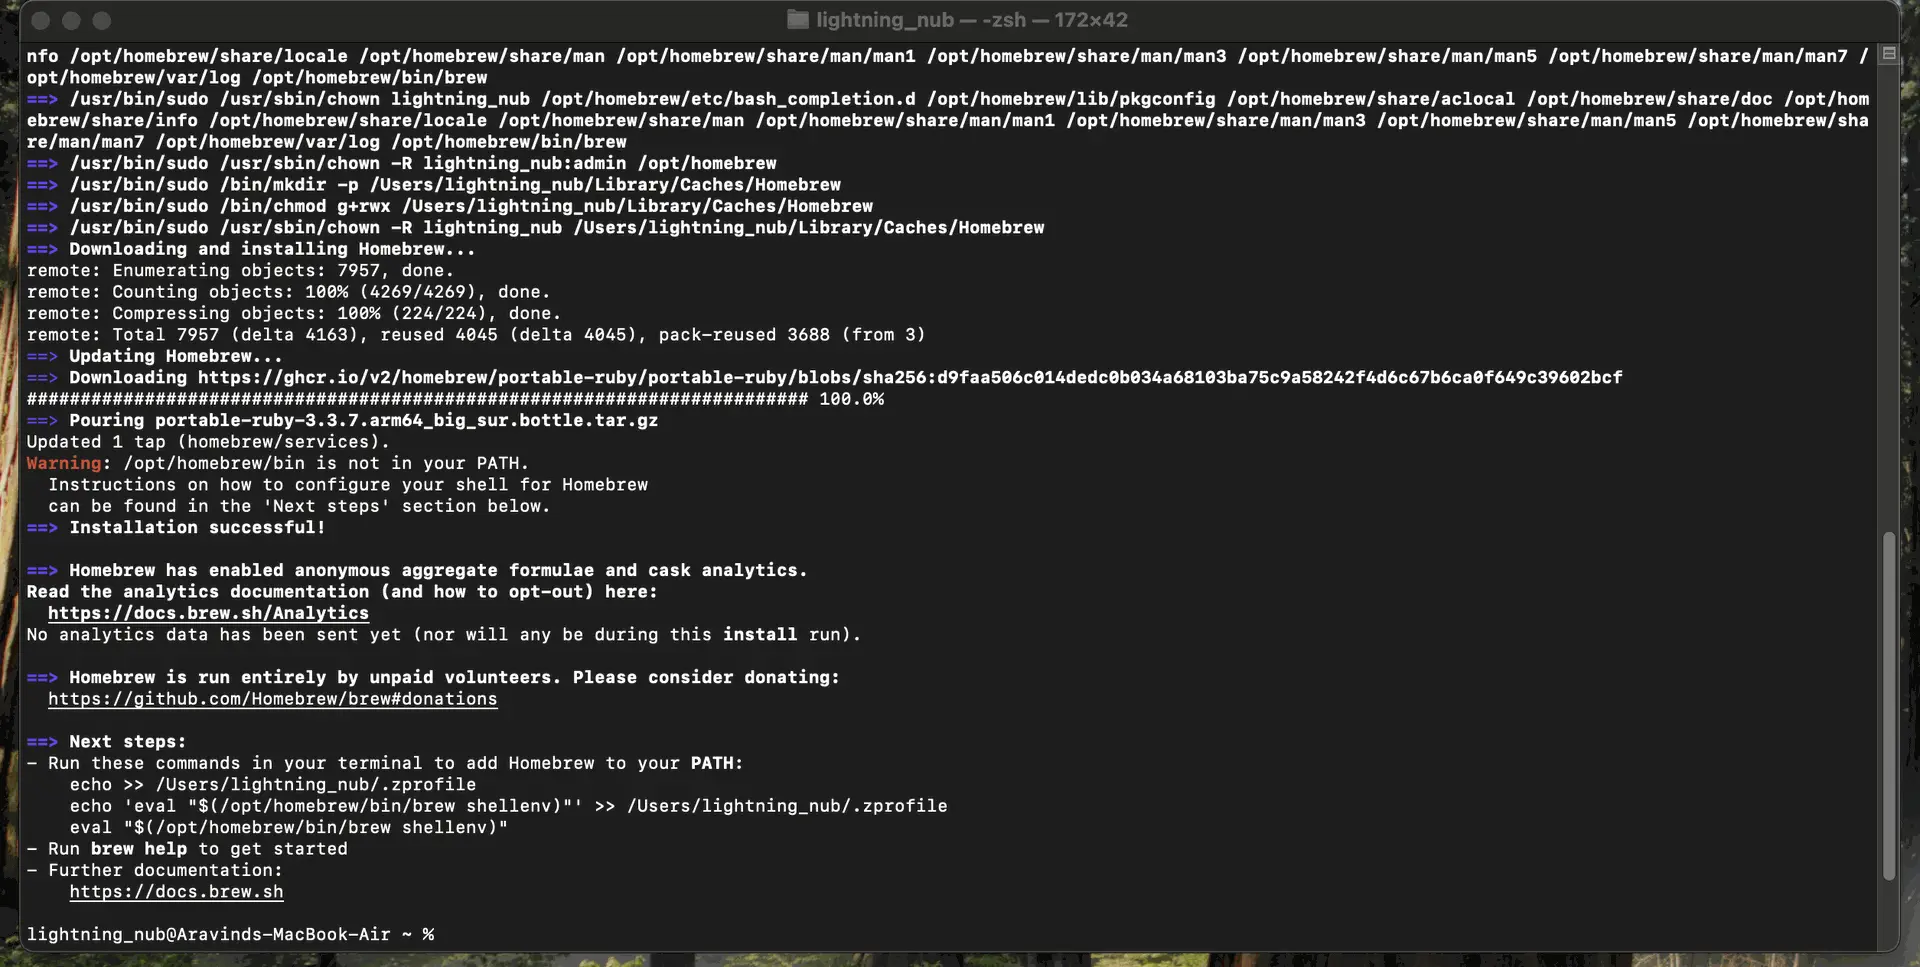
Then update Homebrew by running the following command:
brew update
Step 3: Install Python
Odoo 18 requires Python 3.10 or later.
Run the following command to install Python 3.12:
brew install python@3.12
After installation, set the Python path by running:
echo 'export PATH="/opt/homebrew/opt/python@3.12/bin:$PATH"' >> ~/.zshrc
Step 4: Install PostgreSQL
Run the following command to install PostgreSQL 14:
brew install postgresql@14
To start PostgreSQL and ensure it runs on system boot, use:
brew services start postgresql
Step 5: Configure PostgreSQL for Odoo
Run the following commands to create and configure a PostgreSQL role for Odoo:
CREATE ROLE odoo WITH LOGIN PASSWORD 'odoo';
ALTER ROLE odoo CREATEDB;
To grant additional permissions, use:
ALTER ROLE odoo WITH LOGIN CREATEDB CREATEROLE;
Step 6: Clone the Odoo Repository
Install Git
If Git is not installed, run the following command to install it:
brew install git
Clone the Odoo 18 Repository
Run the following command to clone the Odoo 18 repository from GitHub:
git clone --depth 1 --branch 18.0 https://github.com/odoo/odoo --single-branch odoo
Navigate to the Odoo Directory
After cloning, move into the newly created Odoo directory:
cd odoo
Create the odoo.conf File
Use the nano text editor to create and edit the odoo.conf file. Run the following command to create and open it:
nano odoo.conf
Edit the Configuration File
Inside the odoo.conf file, paste the below data:
[options]
; Is This The Password That Allows Database Operations:
admin_passwd = admin
db_host = localhost
db_port = 5432
db_user = odoo
db_password = odoo
addons_path = /home/user/odoo/addons #change to you addons path
xmlrpc_port = 8017
Step 7: Install PyCharm Community Edition
Download and Install PyCharm
Download and install PyCharm Community Edition, then open the Odoo project folder in PyCharm.
Configure Python Interpreter
- Go to Settings → Project Settings → Python Interpreter.
- Click the dropdown and select Python 3.12 if it shows up else, select show all
+ Click the ➕ (Add) button in the top-left corner to add a new interpreter.
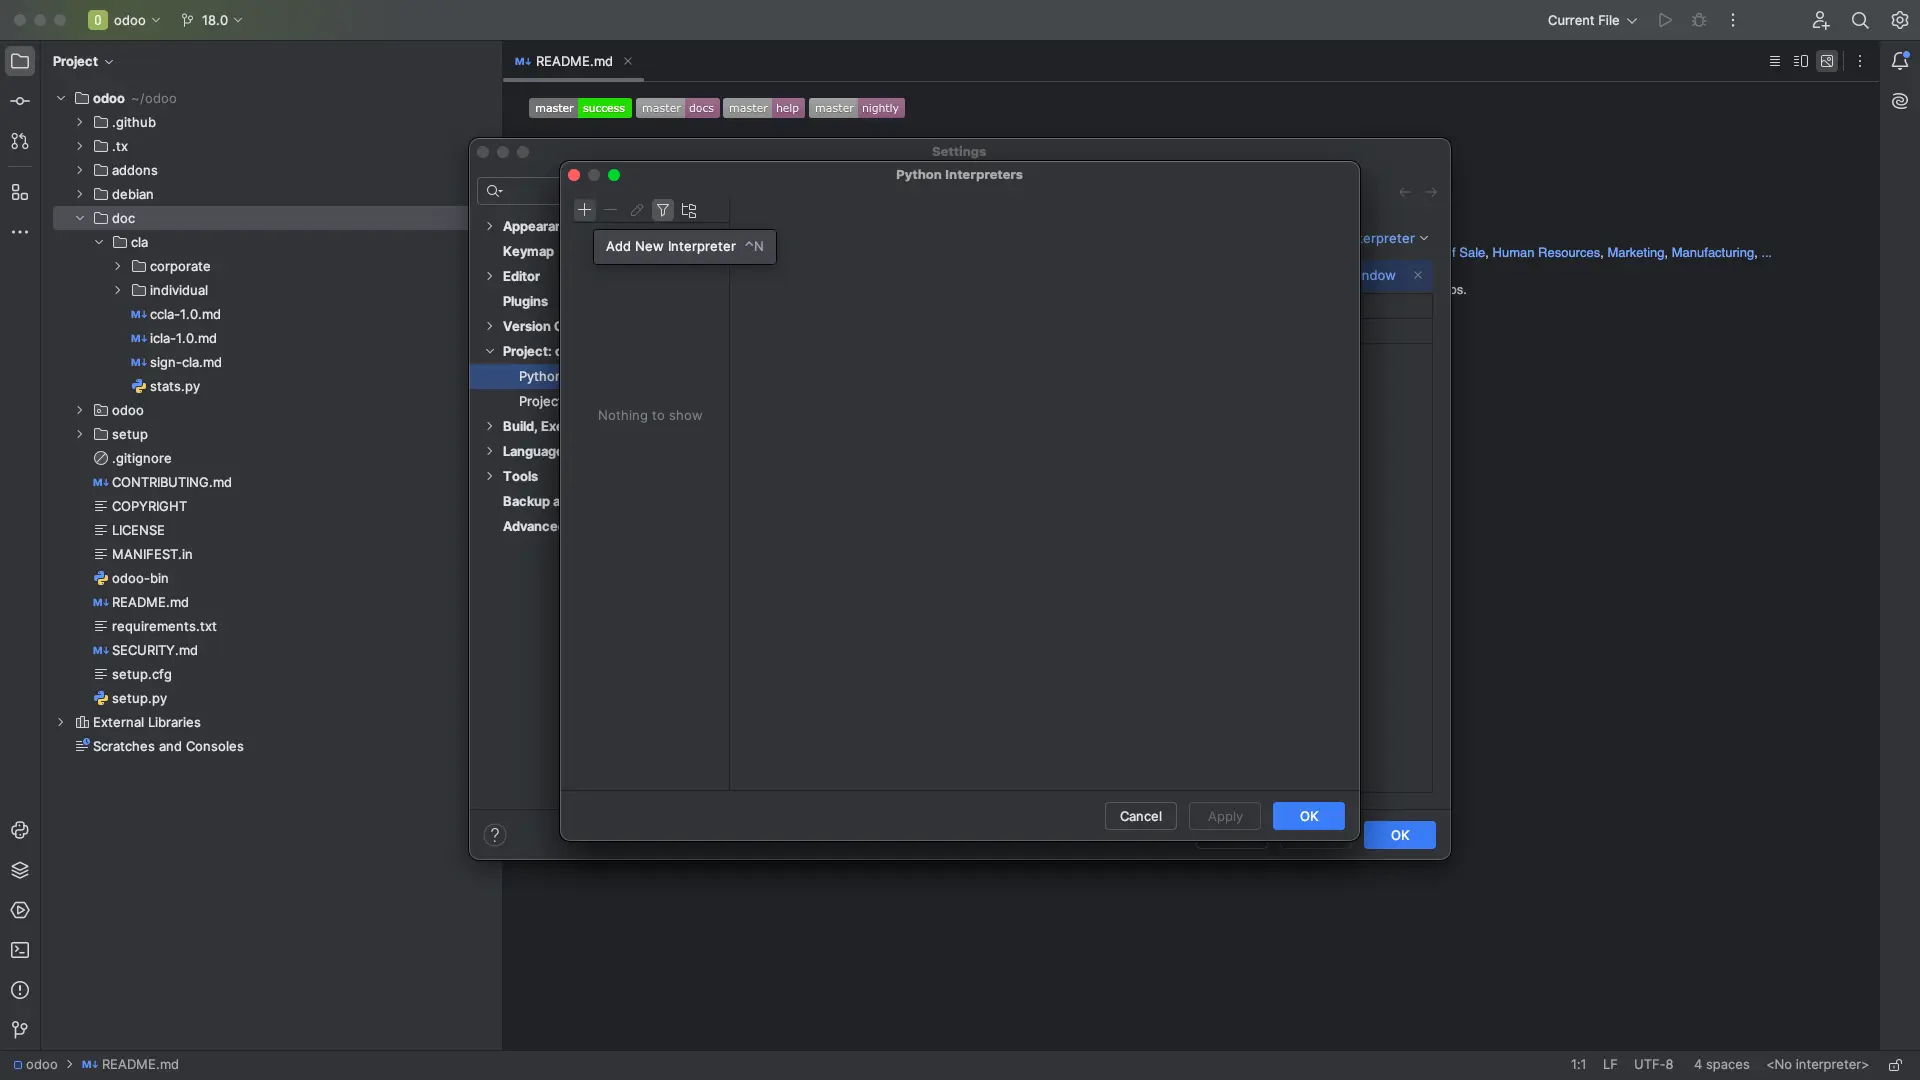
+Open the Base Python dropdown menu and select any version greater than 3.10.
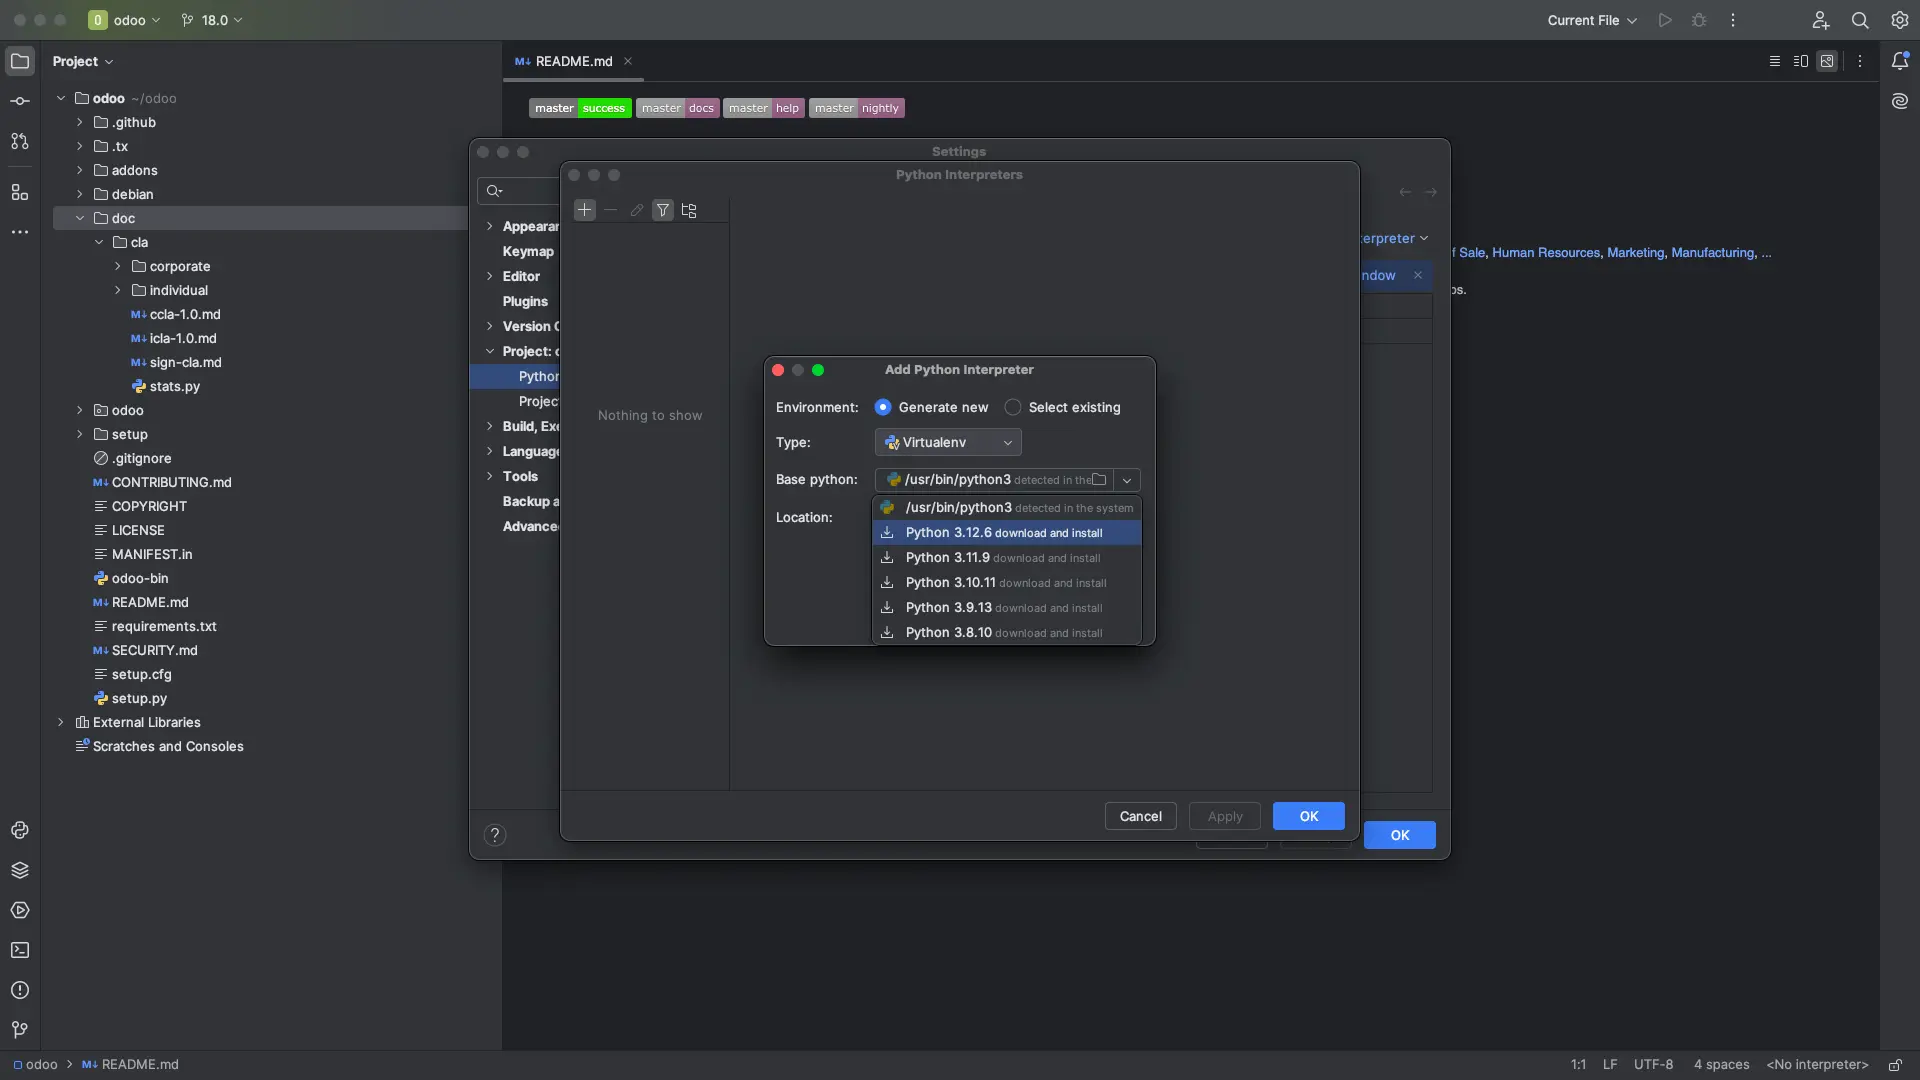
+ The necessary packages will be downloaded automatically.
3. Click Apply and Save.
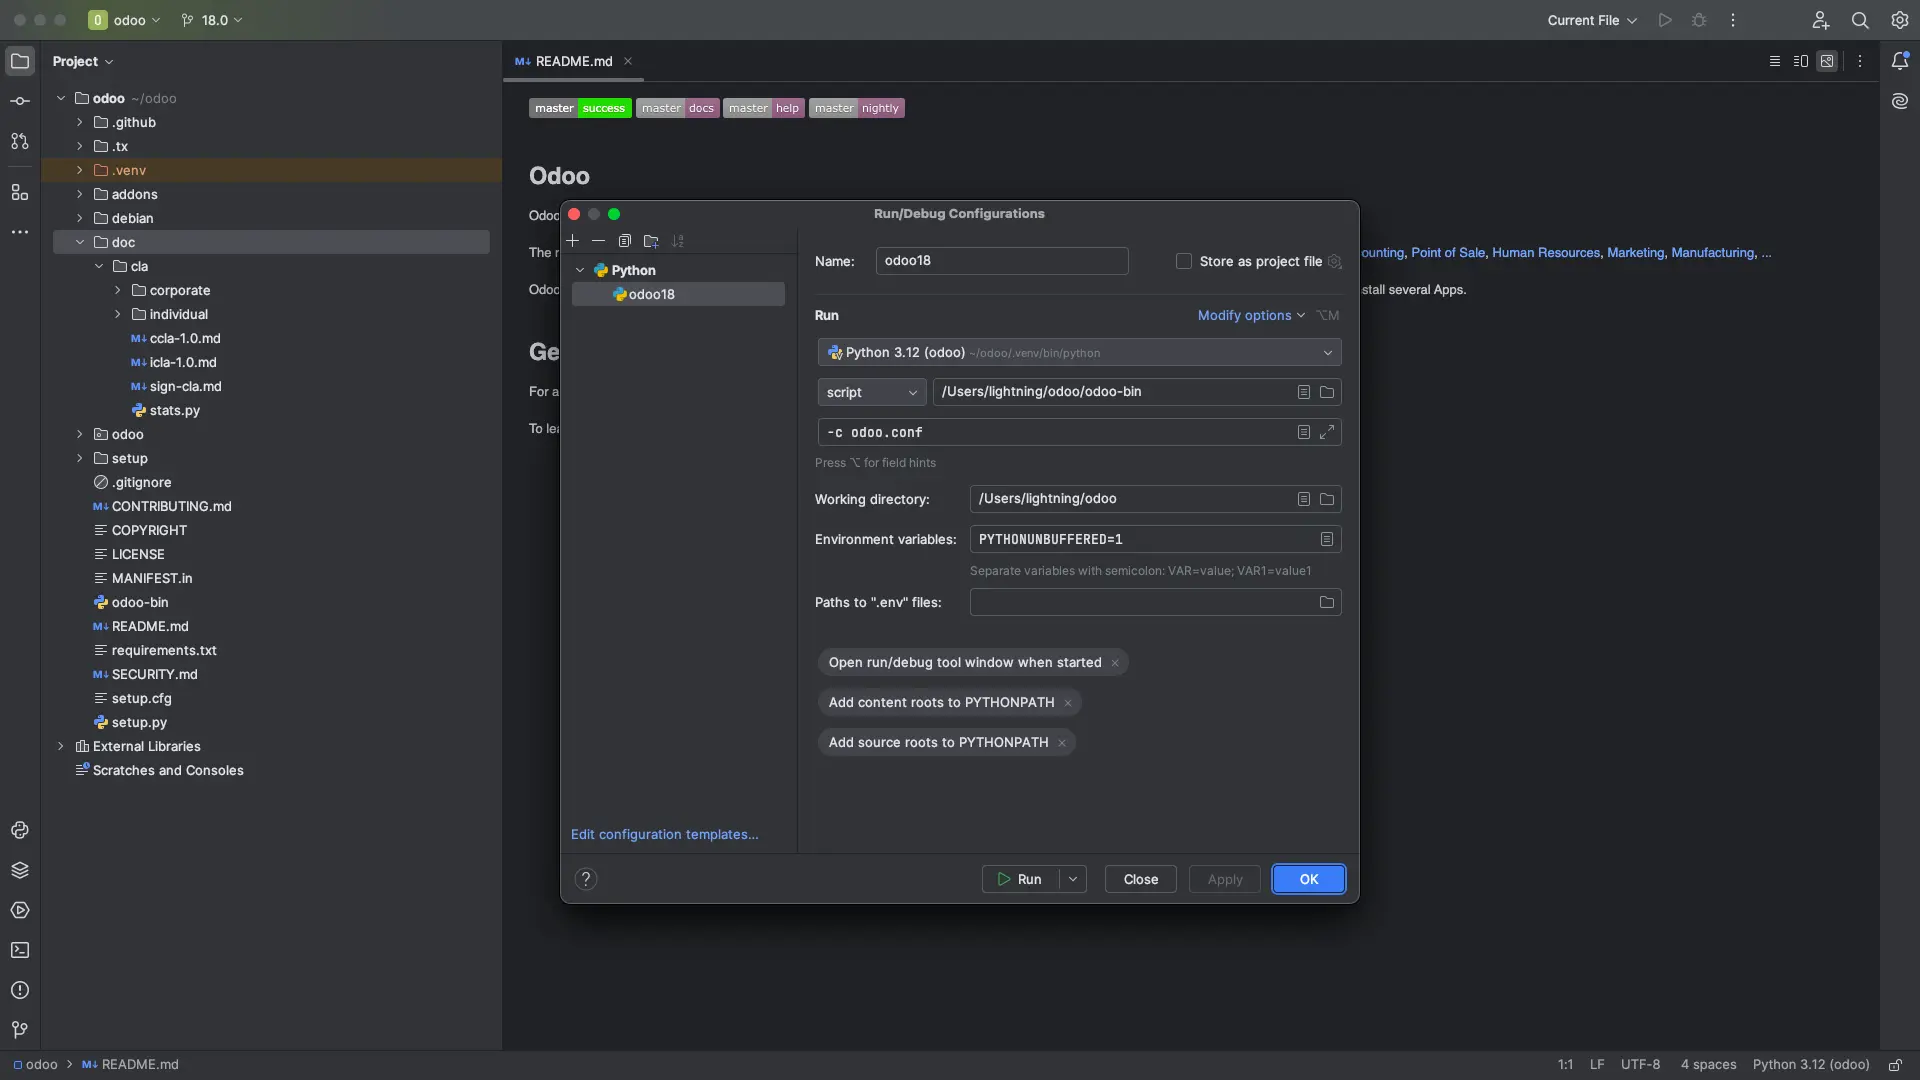
4. Go to Configurations → Edit Configurations.
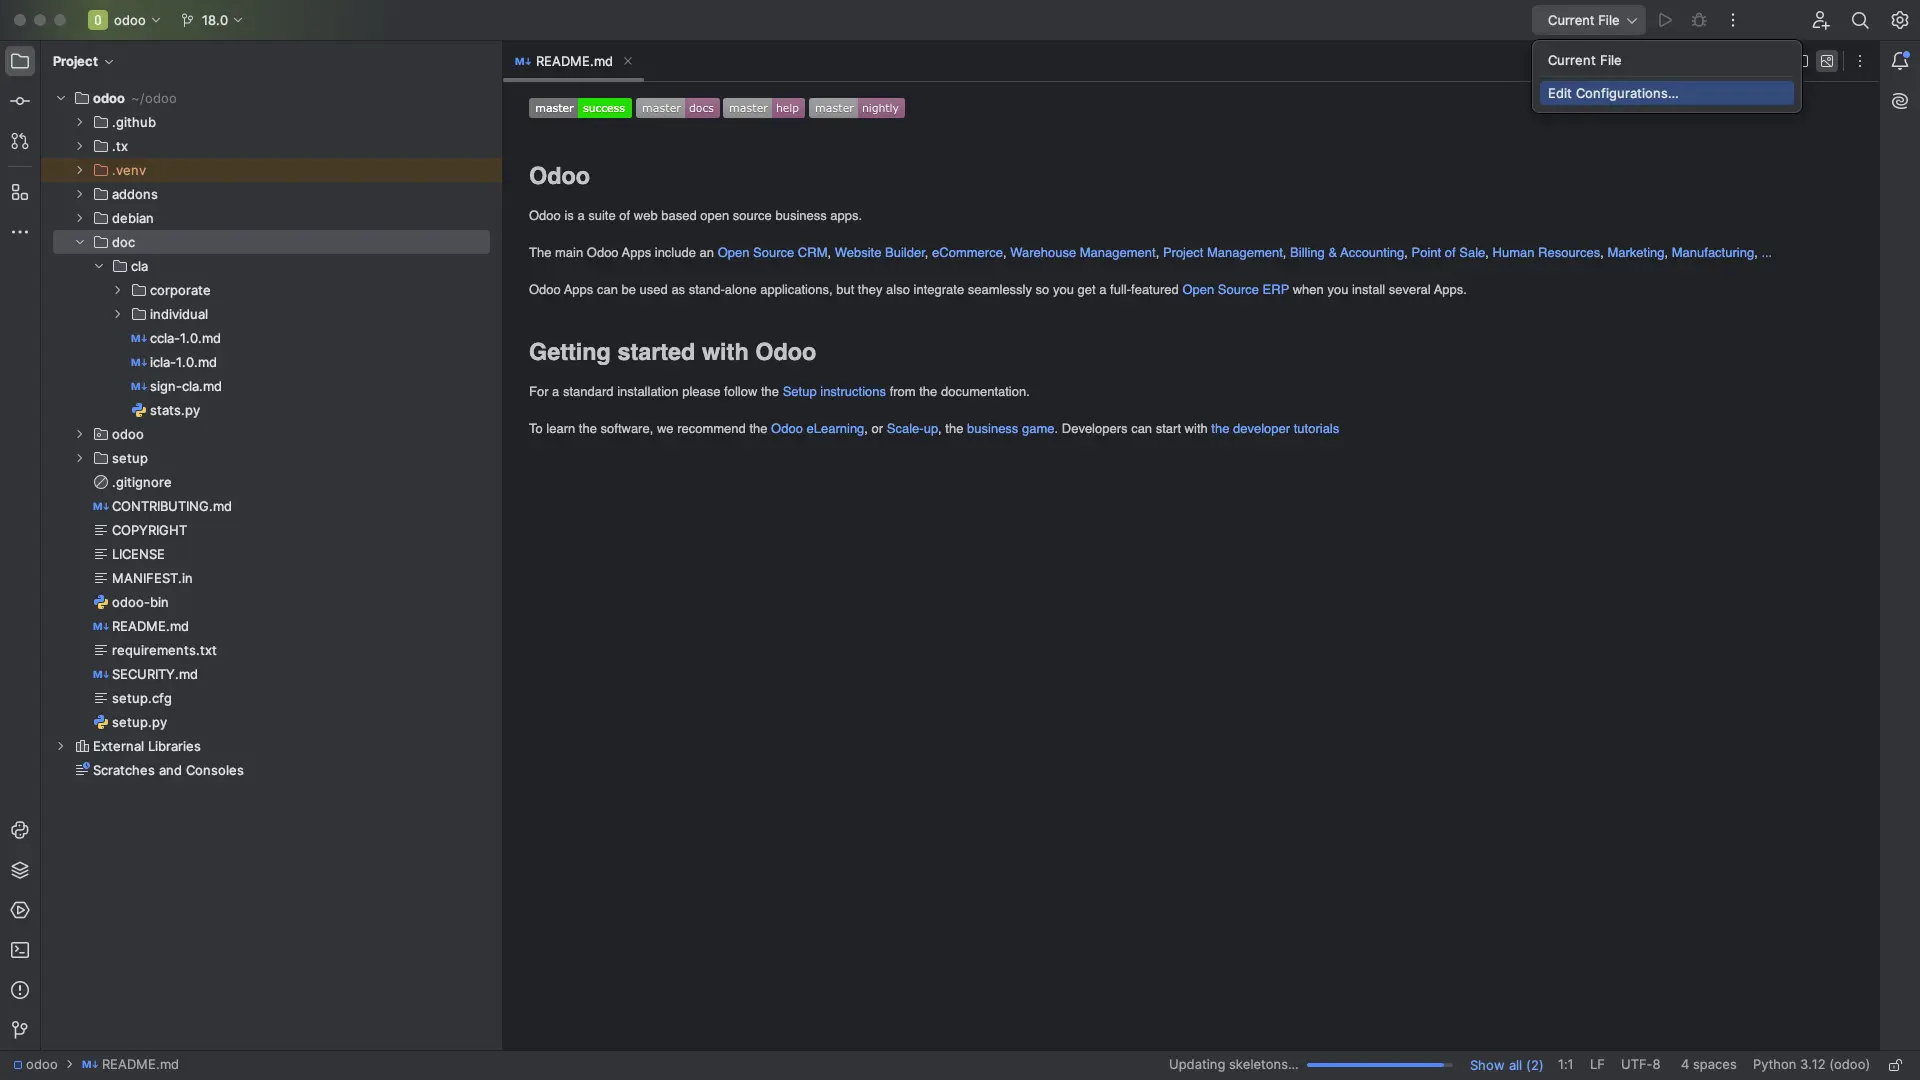
5. Use the Plus(+) icon in the top left panel to add a new configuration, then select Python from the available options:
+ Enter a name for the configuration.
+ Set the Script path to the 'odoo-bin' file in the extracted Odoo-18 project directory.
+ Specify the Python interpreter if it’s not already displayed.
+ For the Working directory, select the extracted project folder.
+ In Parameters, enter: '-c odoo.conf'
Install Requirements
Open the terminal and navigate to the Odoo directory (or via Pycharm terminal)
Activate the virtual environment venv
source .venv/bin/activate
Then install requirements.txt by running
pip install -r requirements.txt
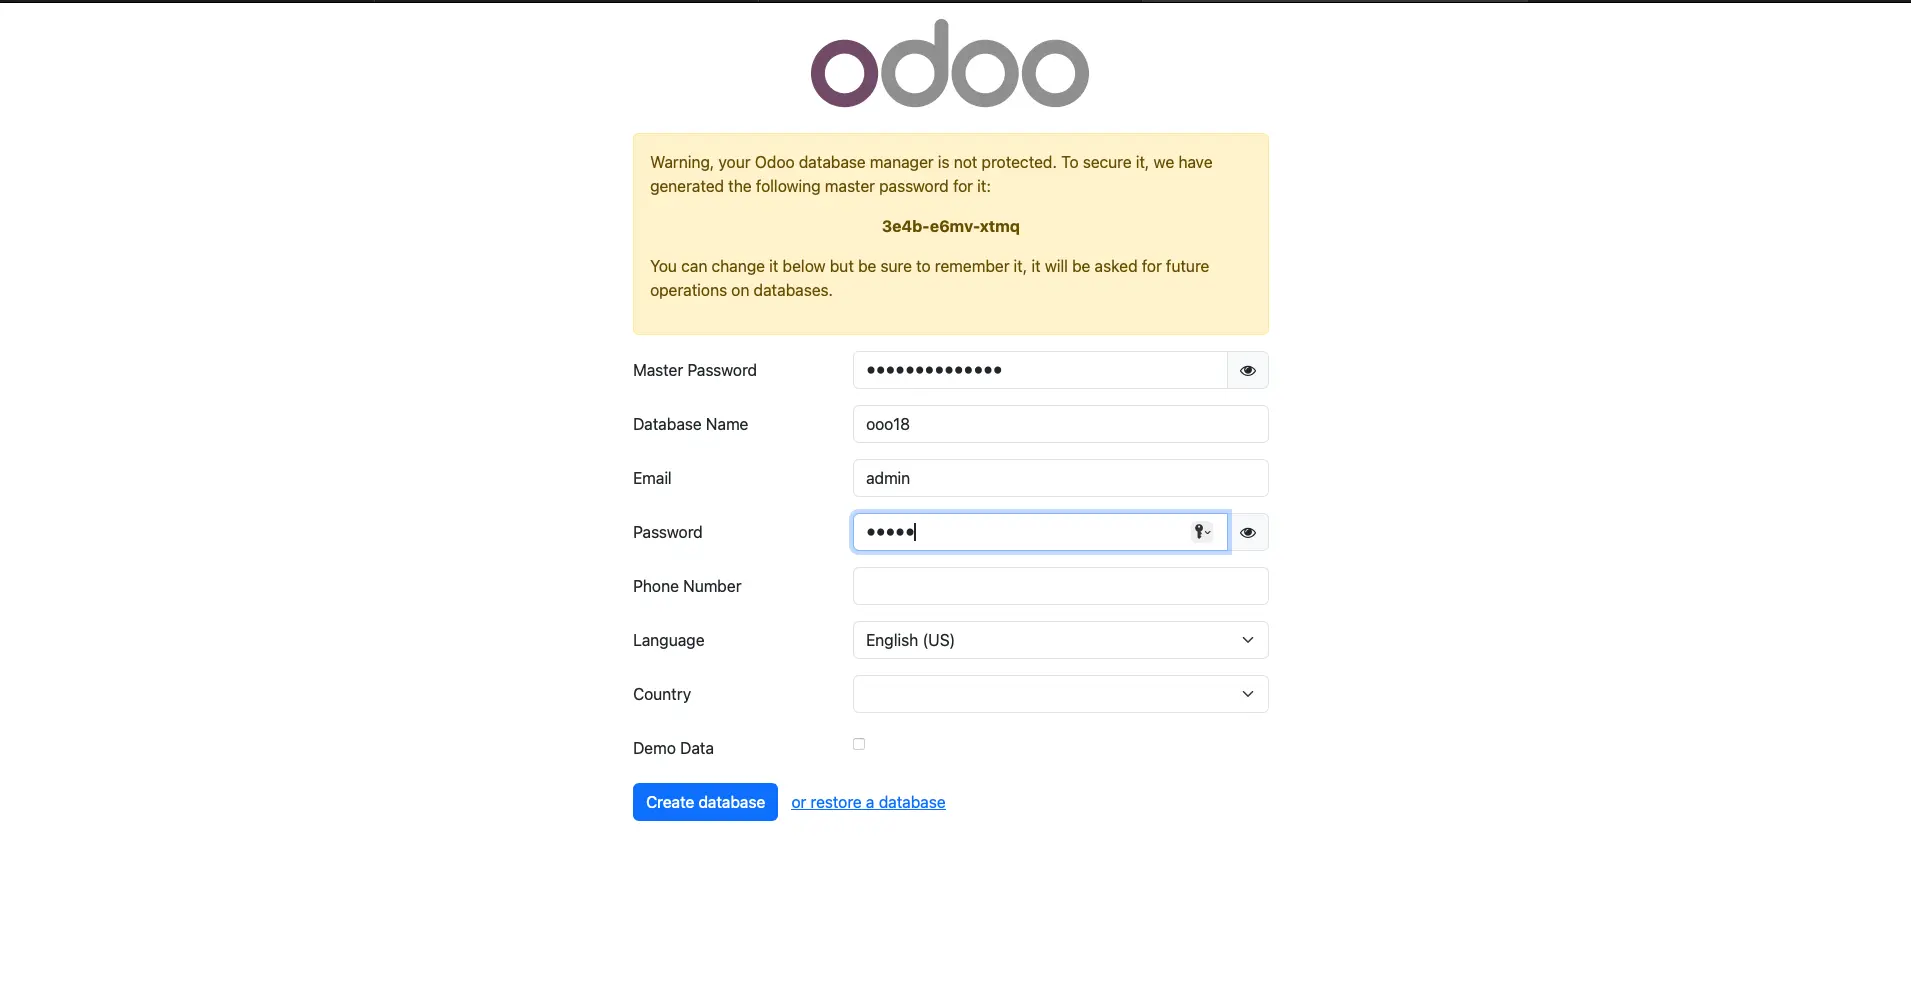
After installation, run the application and go to localhost: 8017 to set up a new database.
You have successfully installed Odoo 18 on your Mac! This guide ensures a smooth installation process, even if you have limited technical knowledge. If you experience any issues, revisit the steps and verify your configurations.
Meraki Technology provide expert Odoo ERP Software Development Services, including Odoo ERP Implementation, Customization, Migration, and Support. Our team of experienced Odoo developers has successfully implemented projects across the USA, UK, Australia, Europe, New Zealand, the Middle East, and South Africa. If you need assistance with your Odoo setup, feel free to contact us and fill out the form with your questions. Our experts will reach out to help you find the best Odoo solution for your business.